作者:Ted Lee
本文使用 ChatGPT 來生成圖檔(photo)、影片檔(video)與音檔(audio)三大類常見的多媒體播放器(multimedia player)的 Python 程式碼。
其中,我們在圖檔播放器中餵入「UI(User Interface,使用者界面)設計稿」來指引 ChatGPT 依此版面安排各 Tkinter 的視窗元件(window components)。
此外,在影片檔播放器的程式碼生成過程中,我們將引導讀者 Python 處理在影片檔播放前需要安裝哪些合適的套件(package)/模組(module)。
最後,我們將在 fChart 裝入 pygame 套件來完成音檔的播放功能。
一、圖檔播放器
首先,我們使用自編的網頁教材 ,讓學生們先搜尋這類播放器的 UI 畫面設計。果然,年輕的學生常常是天生的藝術家,我們列舉一些優良的作品如圖 1 所示。
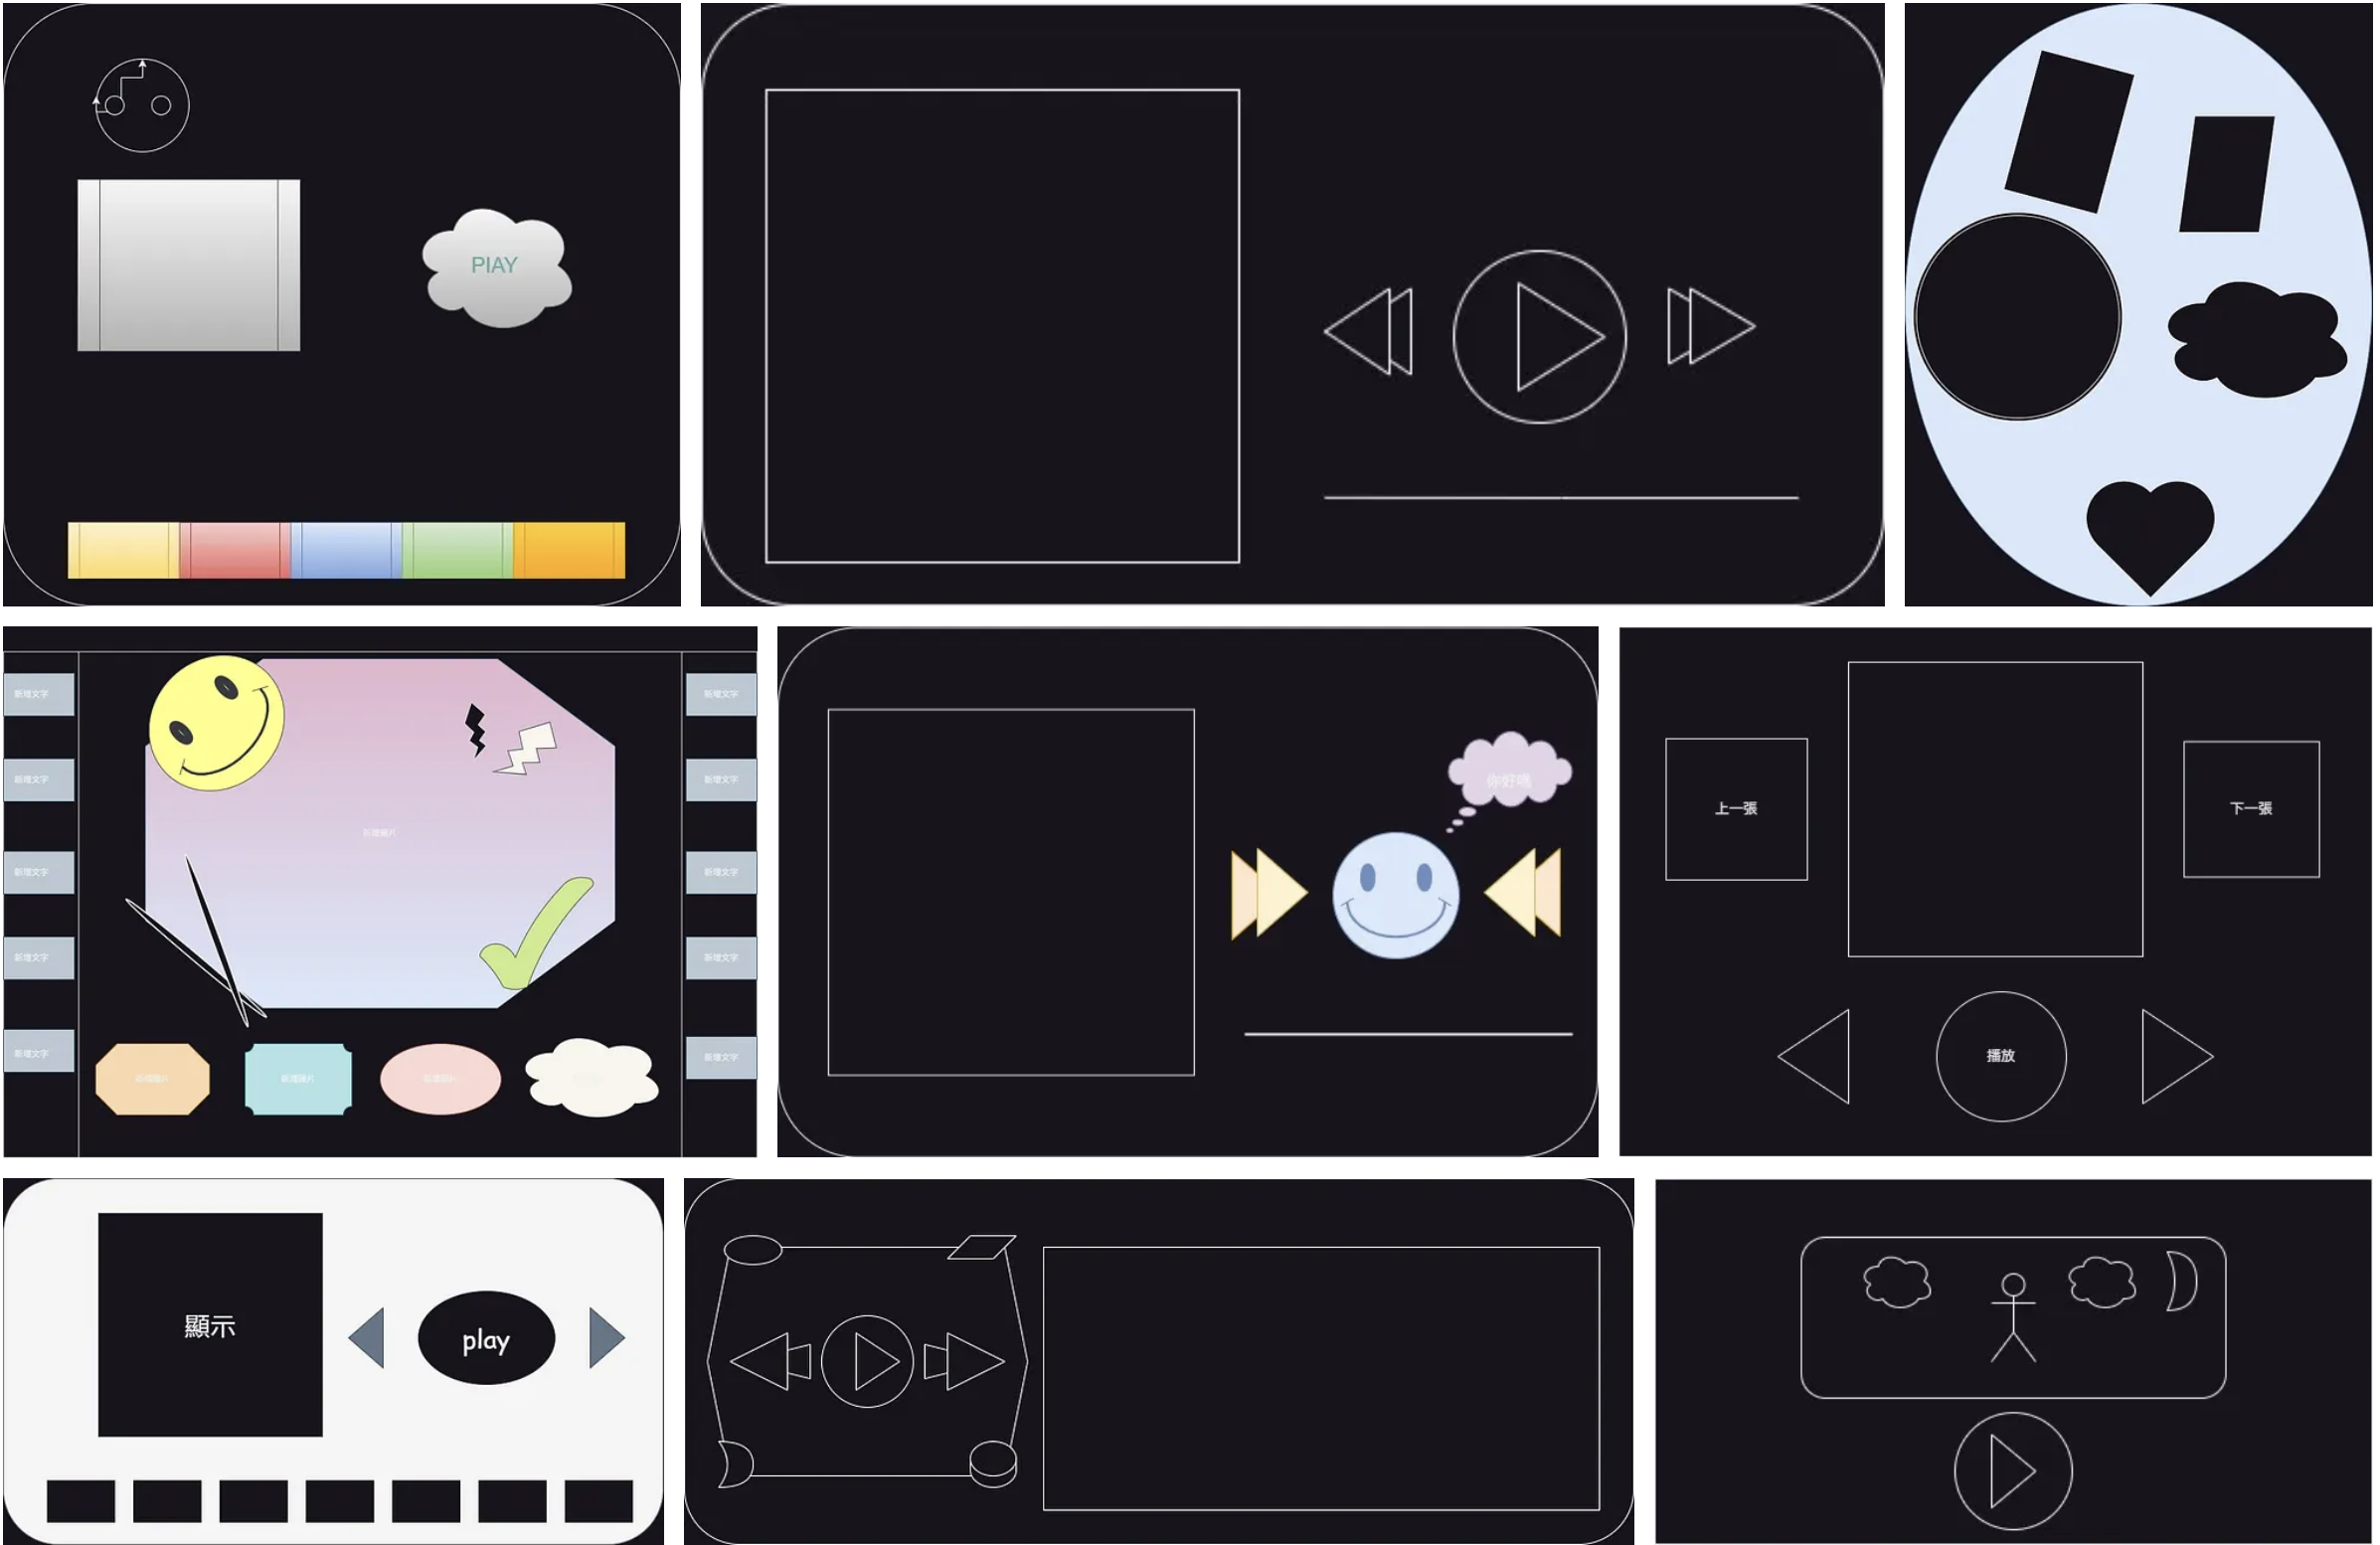
圖 1:學生的 UI 設計稿
接著,我們 在 ChatGPT(其他 GPT 版本亦同)使用以下的咒語:
(人設)你是 Python Tkinter 視窗程式設計高手
(任務)根據「設計稿」,產生圖片播放器,要支援各種常見的圖片格式
(輸出)生成 Python 程式碼
註:生成式 AI 一定有答案,答案不止一套,並且常常胡說八道!
生成的參考程式碼如下:
PhotoPlayer.py
import os

import tkinter as tk

from tkinter import filedialog

from PIL import Image, ImageTk


# 全域變數

root = None

canvas = None

image_list = []

image_index = 0

tk_image = None

supported_formats = ('.png', '.jpg', '.jpeg', '.bmp', '.gif')


def load_images():

    """載入圖片資料夾"""

    global image_list, image_index


    folder_path = filedialog.askdirectory(title="選擇圖片資料夾")

    if not folder_path:

        return


    image_list = [

        os.path.join(folder_path, f)

        for f in os.listdir(folder_path)

        if f.lower().endswith(supported_formats)

    ]

    image_list.sort()

    image_index = 0


    if image_list:

        show_image()


def show_image():

    """顯示當前圖片"""

    global tk_image


    if not image_list:

        return


    image_path = image_list[image_index]

    img = Image.open(image_path)


    # 取得視窗大小並等比例縮放圖片

    canvas_width = canvas.winfo_width()

    canvas_height = canvas.winfo_height()

    img.thumbnail((canvas_width, canvas_height))


    tk_image = ImageTk.PhotoImage(img)

    canvas.delete("all")

    canvas.create_image(canvas_width // 2, canvas_height // 2, image=tk_image, anchor=tk.CENTER)

    root.title(f"圖片播放器 - {os.path.basename(image_path)}")


def show_next_image():

    """顯示下一張圖片"""

    global image_index


    if image_list:

        image_index = (image_index + 1) % len(image_list)

        show_image()


def show_prev_image():

    """顯示上一張圖片"""

    global image_index


    if image_list:

        image_index = (image_index - 1) % len(image_list)

        show_image()


def on_resize(event):

    """視窗大小改變時重新顯示圖片"""

    show_image()


def create_gui():

    """建立GUI介面"""

    global root, canvas


    # 建立主視窗

    root = tk.Tk()

    root.title("圖片播放器")

    root.geometry("800x600")


    # 建立畫布

    canvas = tk.Canvas(root, bg="black")

    canvas.pack(fill=tk.BOTH, expand=True)


    # 建立控制按鈕框架

    control_frame = tk.Frame(root)

    control_frame.pack(fill=tk.X, pady=5)


    # 建立按鈕

    tk.Button(control_frame, text="開啟資料夾", command=load_images).pack(side=tk.LEFT, padx=5)

    tk.Button(control_frame, text="上一張", command=show_prev_image).pack(side=tk.LEFT, padx=5)

    tk.Button(control_frame, text="下一張", command=show_next_image).pack(side=tk.LEFT, padx=5)


    # 綁定視窗大小改變事件

    root.bind("", on_resize)


def main():

    """主程式"""

    create_gui()

    root.mainloop()


if __name__ == "__main__":

    main()
以上程式碼在 fChart 的執行畫面如圖 2(測試素材可由此下載):
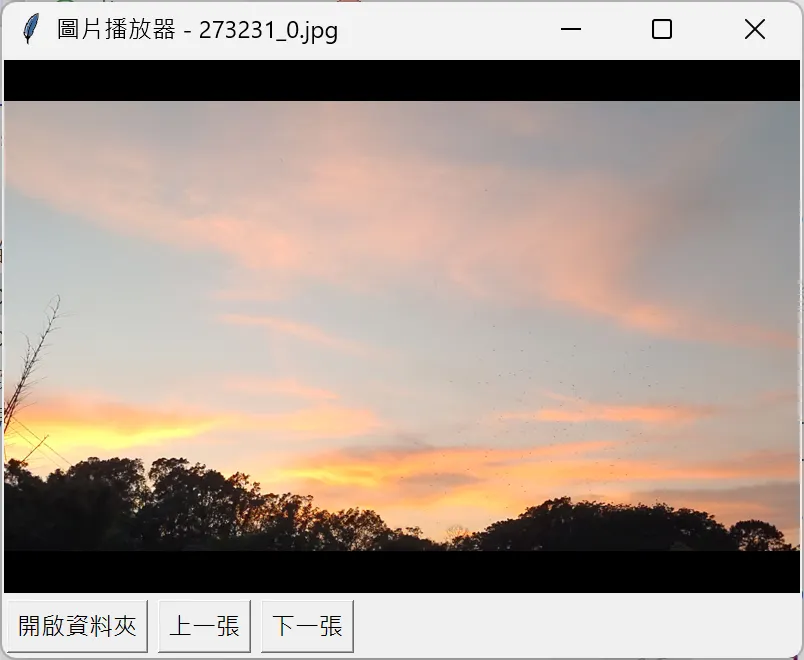
圖 2:PhotoPlayer.py 的執行結果
ChatGPT 果然看不懂學生手繪的設計稿!!!
於是,我們在教學時特地引導學生去思考要如何教 ChatGPT「看懂圖」這回事。註:就用「我們怎們教別人看懂自己的設計稿」的概念,明確標示出稿上每一處的用途!
果不期然,高手在學生。有學生叫 ChatGPT 照稿生出來了(圖 3):
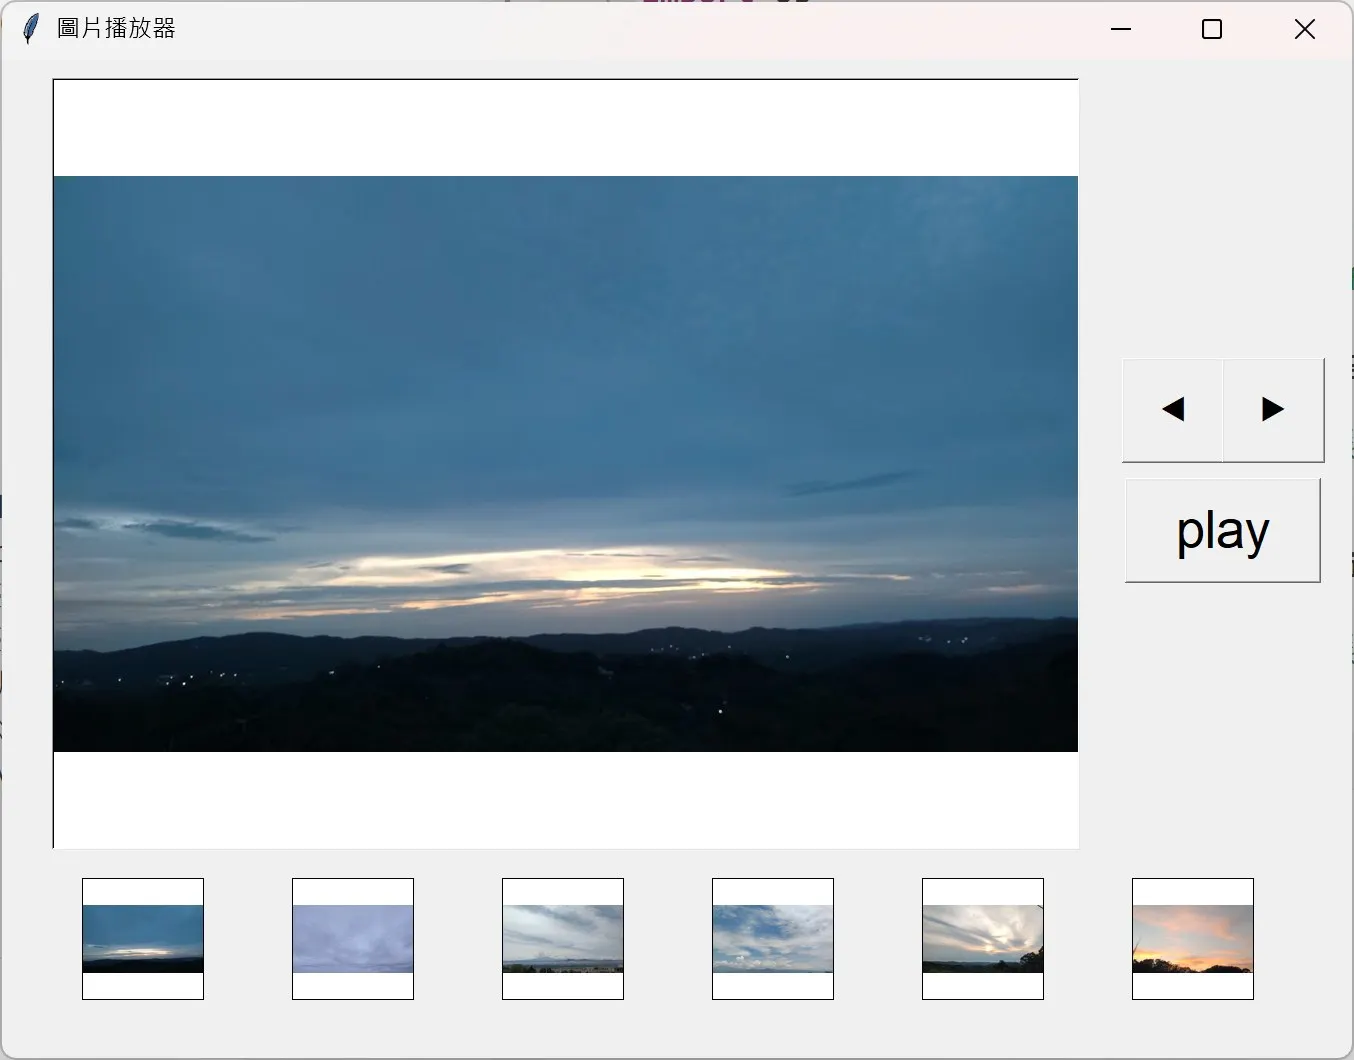
圖 3:能遵照手繪設計稿生成的圖檔播放器
圖 3 對應的原始程式碼如下所示:
PhotoPlayer1.py
import tkinter as tk

from tkinter import filedialog, messagebox

from PIL import Image, ImageTk

import os

import glob

class ImagePlayer:

    def __init__(self, root):

        self.root = root

        self.root.title("圖片播放器")

        self.root.geometry("1400x900")  # 大視窗

        self.root.configure(bg="#f0f0f0")

        # 選擇資料夾

        self.image_folder = filedialog.askdirectory(title="請選擇圖片資料夾")

        if not self.image_folder:

            messagebox.showerror("錯誤", "你沒有選擇資料夾,程式將關閉")

            root.destroy()

            return

        self.image_files = self.load_images()

        if not self.image_files:

            messagebox.showerror("錯誤", "資料夾中沒有支援的圖片")

            root.destroy()

            return

        self.index = 0

        self.playing = False

        # 主圖顯示(最大 1024x768)

        self.display_label = tk.Label(root, width=1024, height=768, bg="white", bd=2, relief="sunken")

        self.display_label.place(x=50, y=20)

        # 控制按鈕

        self.left_button = tk.Button(root, text="◀", font=("Arial", 20), width=3, command=self.prev_image)

        self.left_button.place(x=1120, y=300)

        self.right_button = tk.Button(root, text="▶", font=("Arial", 20), width=3, command=self.next_image)

        self.right_button.place(x=1220, y=300)

        self.play_button = tk.Button(root, text="play", font=("Arial", 16), width=6, command=self.toggle_play)

        self.play_button.place(x=1170, y=380)

        # ✅ 縮圖區(6 張)

        self.thumb_labels = []

        for i in range(6):  # 改為 6 張

            label = tk.Label(root, width=120, height=120, bg="white", bd=1, relief="solid")

            label.place(x=80 + i * 210, y=820)  # 排列間距調整

            label.bind("", lambda e, i=i: self.select_image_by_thumb(i))

            self.thumb_labels.append(label)

        self.update_thumbnails()

        self.show_image()

    def load_images(self):

        supported_ext = ('*.jpg', '*.png', '*.gif', '*.bmp')

        files = []

        for ext in supported_ext:

            files.extend(glob.glob(os.path.join(self.image_folder, ext)))

        return sorted(files)

    def show_image(self):

        if not self.image_files:

            return

        image_path = self.image_files[self.index]

        img = Image.open(image_path)

        img.thumbnail((1024, 768))  # 放大主圖限制

        img_tk = ImageTk.PhotoImage(img)

        self.display_label.config(image=img_tk)

        self.display_label.image = img_tk

    def update_thumbnails(self):

        for i in range(6):  # 6 張縮圖

            label = self.thumb_labels[i]

            if i < len(self.image_files):

                img = Image.open(self.image_files[i])

                img.thumbnail((120, 120))

                img_tk = ImageTk.PhotoImage(img)

                label.config(image=img_tk)

                label.image = img_tk

            else:

                label.config(image='', text='')

    def select_image_by_thumb(self, i):

        if i < len(self.image_files):

            self.index = i

            self.show_image()

    def prev_image(self):

        self.index = (self.index - 1) % len(self.image_files)

        self.show_image()

    def next_image(self):

        self.index = (self.index + 1) % len(self.image_files)

        self.show_image()

    def toggle_play(self):

        self.playing = not self.playing

        self.play_button.config(text="stop" if self.playing else "play")

        if self.playing:

            self.auto_play()

    def auto_play(self):

        if self.playing:

            self.next_image()

            self.root.after(1000, self.auto_play)

# ========= 主程式入口 =========

if __name__ == "__main__":

    root = tk.Tk()

    app = ImagePlayer(root)

    root.mainloop()
二、影片檔播放器
我們使用以下咒語指揮 ChatGPT 生出程式碼:
(任務)產生影片播放器,要支援各種常見的影片格式
(輸出)生成 Python 程式碼
ChatGPT 生成的參考程式碼如下:
VideoPlayer.py
import tkinter as tk

from tkinter import filedialog

from PIL import Image, ImageTk

import cv2

import threading

import time


class VideoPlayer:

    def __init__(self, root):

        self.root = root

        self.root.title("影片播放器")

        self.root.geometry("800x600")


        self.label = tk.Label(root)

        self.label.pack()


        self.btn_open = tk.Button(root, text="開啟影片", command=self.load_video)

        self.btn_open.pack(side=tk.LEFT, padx=10)


        self.btn_play = tk.Button(root, text="播放", command=self.play_video)

        self.btn_play.pack(side=tk.LEFT, padx=10)


        self.btn_pause = tk.Button(root, text="暫停", command=self.pause_video)

        self.btn_pause.pack(side=tk.LEFT, padx=10)


        self.cap = None

        self.playing = False

        self.video_thread = None


    def load_video(self):

        filepath = filedialog.askopenfilename(

            title="選擇影片",

            filetypes=[("Video files", "*.mp4 *.avi *.mov *.mkv"), ("All files", "*.*")]

        )

        if filepath:

            self.cap = cv2.VideoCapture(filepath)

            self.playing = False

            self.show_frame()  # 顯示第一幀畫面


    def show_frame(self):

        if self.cap and self.cap.isOpened():

            ret, frame = self.cap.read()

            if ret:

                # 轉換顏色 BGR → RGB

                frame = cv2.cvtColor(frame, cv2.COLOR_BGR2RGB)

                img = Image.fromarray(frame)

                img = img.resize((800, 450))  # 調整顯示大小

                imgtk = ImageTk.PhotoImage(image=img)

                self.label.imgtk = imgtk

                self.label.config(image=imgtk)


    def play_video(self):

        if not self.cap or not self.cap.isOpened():

            return

        self.playing = True

        if not self.video_thread or not self.video_thread.is_alive():

            self.video_thread = threading.Thread(target=self.update_frame)

            self.video_thread.start()


    def update_frame(self):

        while self.playing and self.cap.isOpened():

            ret, frame = self.cap.read()

            if not ret:

                break

            frame = cv2.cvtColor(frame, cv2.COLOR_BGR2RGB)

            img = Image.fromarray(frame)

            img = img.resize((800, 450))

            imgtk = ImageTk.PhotoImage(image=img)

            self.label.imgtk = imgtk

            self.label.config(image=imgtk)

            time.sleep(1/30)  # 假設影片為 30 FPS


    def pause_video(self):

        self.playing = False


if __name__ == "__main__":

    root = tk.Tk()

    app = VideoPlayer(root)

    root.mainloop()
以上程式碼在 fChart 的執行結果如圖 4 所示(測試素材可由此下載):
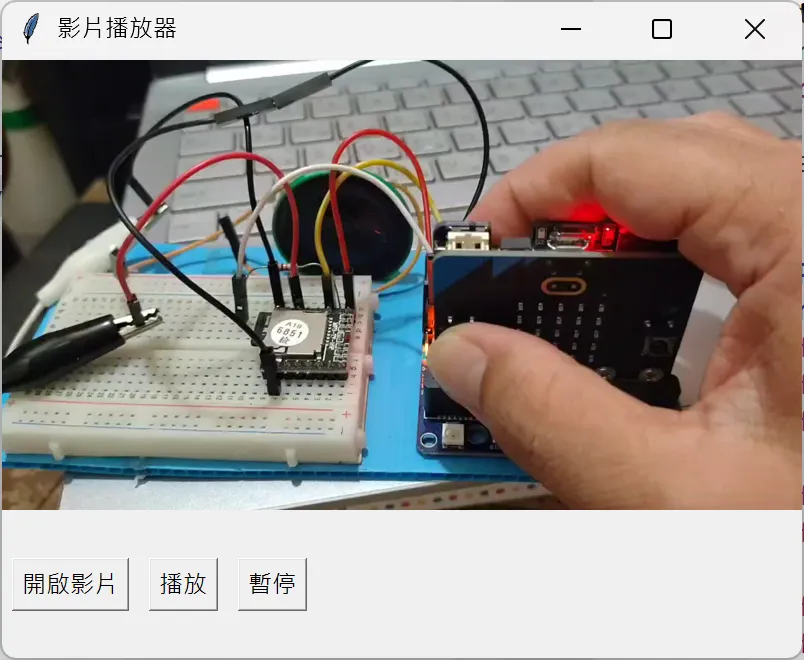
圖 4:VideoPlayer.py 的執行畫面
註:fChart 已安裝了 Python 版的 OpenCV(4.5.3.56)和 Pillow(PIL)(8.3.1)套件了(圖 5)。
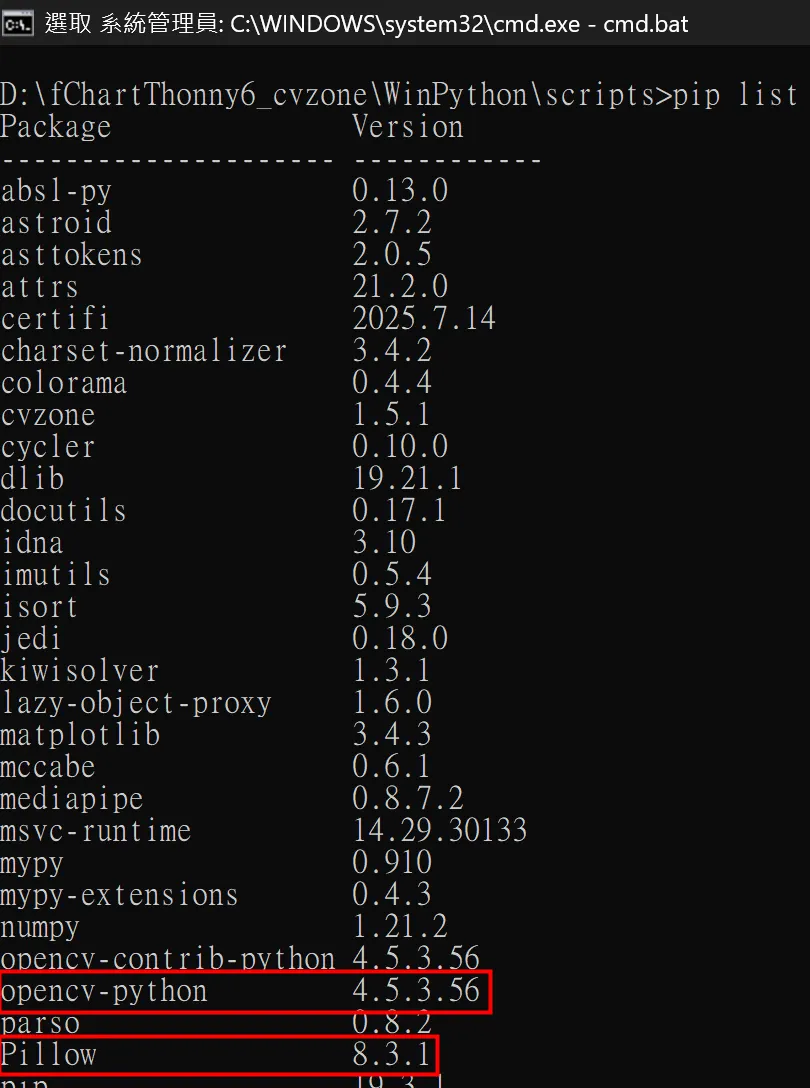
圖 5:fChart 已裝妥 Python 版的 Open CV 和 Pillow
此時,細心的讀者可能會發現:VideoPlayer.py 播放的測試影片是「有影(像)無聲(音)。
我們再詢問 ChatGPT 細究原因,它說「OpenCV 本身不支援音訊播放」並建議以下三個解決方法:
- VLC(VideoLAN Client) → 最穩定
- ffmpeg → 最常見
- moviepy → 有封裝好的音訊介面
根據 ChatGPT 的指示,先下載和安裝 VLC,我們甞試使用 VLC。接著再安裝 Python VLC 套件(pip install python-vlc)(圖 6)。
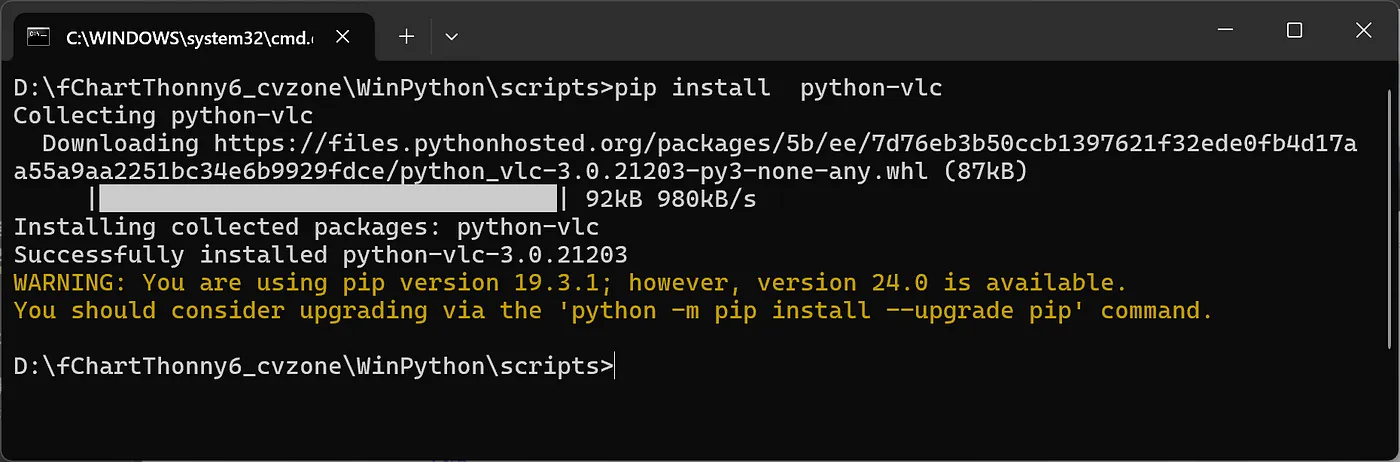
圖 6:fChart 內手動安裝 Python 版的 VLC 套件
如此就大功告成了(圖 7)!
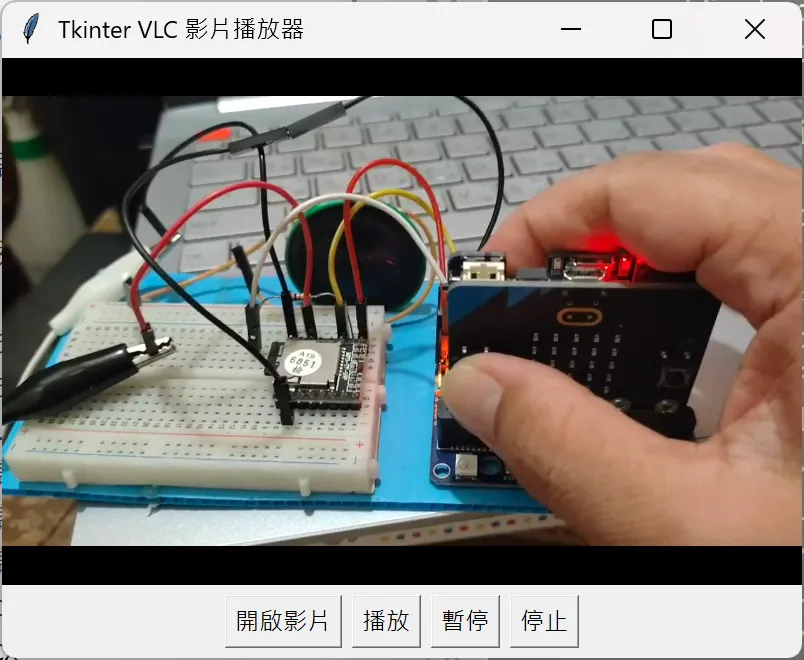
圖 7:安裝了 VLC 的影片檔播放器
參考的程式碼如下:
VideoPlayer_VLC.py
import tkinter as tk

from tkinter import filedialog

import vlc

import os

import platform


class VLCPlayer:

    def __init__(self, root):

        self.root = root

        self.root.title("Tkinter VLC 影片播放器")

        self.root.geometry("800x600")


        # 建立 VLC 播放器實例

        self.instance = vlc.Instance()

        self.player = self.instance.media_player_new()


        # 影片播放區域 Frame

        self.video_panel = tk.Frame(self.root)

        self.video_panel.pack(fill="both", expand=1)


        # 控制按鈕區

        self.btn_frame = tk.Frame(self.root)

        self.btn_frame.pack(pady=10)


        self.open_btn = tk.Button(self.btn_frame, text="開啟影片", command=self.open_file)

        self.open_btn.grid(row=0, column=0, padx=5)


        self.play_btn = tk.Button(self.btn_frame, text="播放", command=self.play)

        self.play_btn.grid(row=0, column=1, padx=5)


        self.pause_btn = tk.Button(self.btn_frame, text="暫停", command=self.pause)

        self.pause_btn.grid(row=0, column=2, padx=5)


        self.stop_btn = tk.Button(self.btn_frame, text="停止", command=self.stop)

        self.stop_btn.grid(row=0, column=3, padx=5)


        self.media = None


        self.root.update()  # 確保元件建立完成


        # 取得影片播放視窗 handle,依系統設置

        self.handle = self.video_panel.winfo_id()

        sys_platform = platform.system()

        if sys_platform == "Windows":

            self.player.set_hwnd(self.handle)

        elif sys_platform == "Linux":

            self.player.set_xwindow(self.handle)

        elif sys_platform == "Darwin":  # macOS

            self.player.set_nsobject(self.handle)


    def open_file(self):

        filepath = filedialog.askopenfilename(filetypes=[("影片檔案", "*.mp4;*.avi;*.mov;*.mkv")])

        if filepath:

            self.media = self.instance.media_new(filepath)

            self.player.set_media(self.media)

            self.play()


    def play(self):

        if self.media:

            self.player.play()


    def pause(self):

        self.player.pause()


    def stop(self):

        self.player.stop()


if __name__ == "__main__":

    # 設定 VLC 的 DLL 路徑(Windows 必要)

    os.environ['PATH'] = r'C:\Program Files\VideoLAN\VLC' + ';' + os.environ['PATH']


    root = tk.Tk()

    app = VLCPlayer(root)

    root.mainloop()
三、音檔播放器
在 ChatGPT 中下達以下咒語:
(任務)Tkinter 視窗版的 MP3 播放器,選擇多首 MP3 曲目後,顯示在畫面上,連續隨機播放這些曲目不停止。正在播放的曲目要用顏色標記
(輸出)Python 程式碼
有了以上第二節的經驗,依照 ChatGPT 的指示,先裝妥 pygame 套件(pip install pygame)後就能生成這個播器的參考程式碼(No-threading.py)。
詳細的操做步驟及更進一步的程式碼拆解請詳参我們先前的拙著《台語 MP3 播放器(Claude + Python):弓(kin)蕉的台語秘密》。
[1]六種授權條款。
(作者為本刊專欄作家,本文同步表於作者部落格,原文連結;責任編輯:謝涵如)

- 用GenAI自動拆解程式碼學習:GenAI時代的新程式學習法 - 2025/12/29
- 「動手」之前 你需要了解電腦系統的基礎知識點! - 2025/11/28
- GenAI拆解學習:以「健康手環監測系統」示例 - 2025/10/23
訂閱MakerPRO知識充電報
與40000位開發者一同掌握科技創新的技術資訊!