作者:王一凡
本文主要介紹如何在Windows平台以Visual Studio為基礎配置OpenVINO C++開發環境,主要步驟有:
- 下載並安裝Visual Studio Community版
- 下載並解壓縮OpenVINO Runtime
- 下載並解壓縮OpenCV
- 在Visual Studio中配置專案屬性
- 執行OpenVINO C++ 範例程式,測試開發環境
1. 下載並安裝Visual Studio Community版
Microsoft Visual Studio(簡稱VS)是Windows 平台上非常好用的整合式開發環境(IDE),其Community 版本免費供學生、開放原始程式碼參與者和個人使用。
從以下連結下載 Visual Studio 2022 Community 版,安裝選項如圖1所示:
https://visualstudio.microsoft.com/zh-hant/downloads/
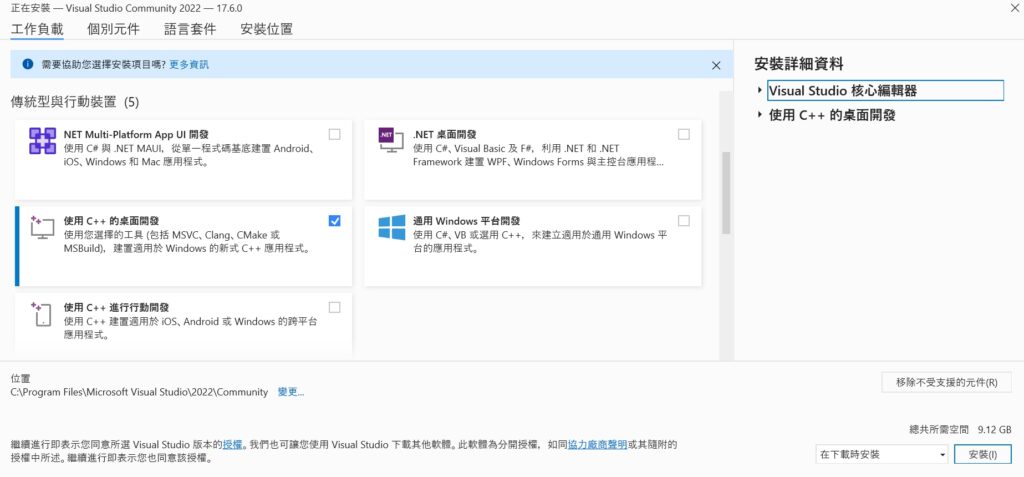
圖1:Visual Studio 2022安裝選項
2. 下載並解壓縮OpenVINO Runtime
OpenVINO Runtime 2022.3以壓縮檔(OpenVINO Archives)的形式提供,裡面包含了開發OpenVINO C++推論程式所必需的檔案,如圖2所示:
- C++前置處理器所需的標頭檔:include資料夾
- C++連結器所需的lib文件:lib資料夾
- 可執行檔(*.exe)所需的動態連結程式庫文件:bin資料夾
- OpenVINO runtime協力廠商依賴資源檔:3rdparty資料夾
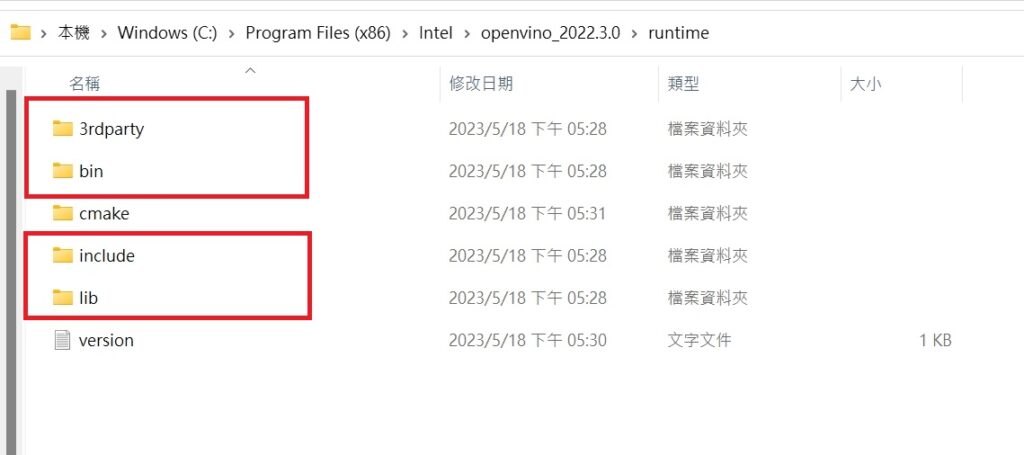
圖2:開發OpenVINO C++推論程式必備的檔案
首先,請讀者先打開下面的連結,下載OpenVINO Runtime 2022.3壓縮檔:
https://www.intel.com/content/www/us/en/developer/tools/openvino-toolkit/download.html
然後,請讀者手動新建C:\Program Files (x86)\Intel\openvino_2022.3.0資料夾,並把壓縮檔解壓縮後的檔案複製到openvino_2022.3.0資料夾中,完成OpenVINO Runtime壓縮檔的下載和解壓縮工作,如圖3所示。
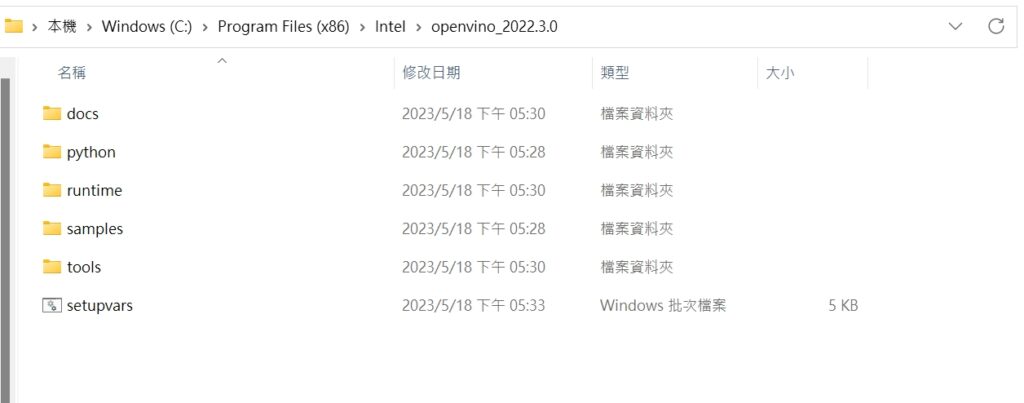
圖3:下載並解壓縮OpenVINO Runtime 壓縮檔
3.下載並解壓縮OpenCV
在端對端的AI推論運算流程中,OpenCV 程式庫用於實現影像載入、資料前處理、推論結果後處理和資料視覺化,如圖4所示。
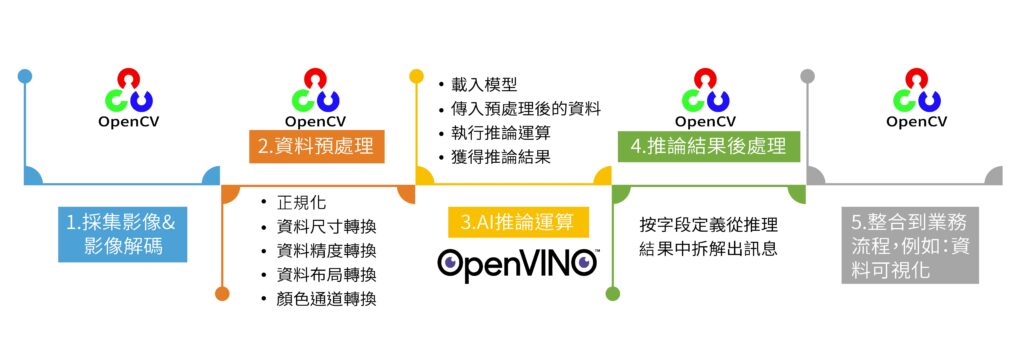
圖4:端對端的AI推論運算流程
OpenCV也是以壓縮檔的形式提供,從以下地址下載 Windows平台適用的壓縮檔:
https://opencv.org/releases/
首先,手動新建 C:\opencv 資料夾;然後,把OpenCV解壓後的 build 資料夾全部複製到 C:\opencv 資料夾,如圖 5所示,完成 OpenCV 的下載並解壓縮。
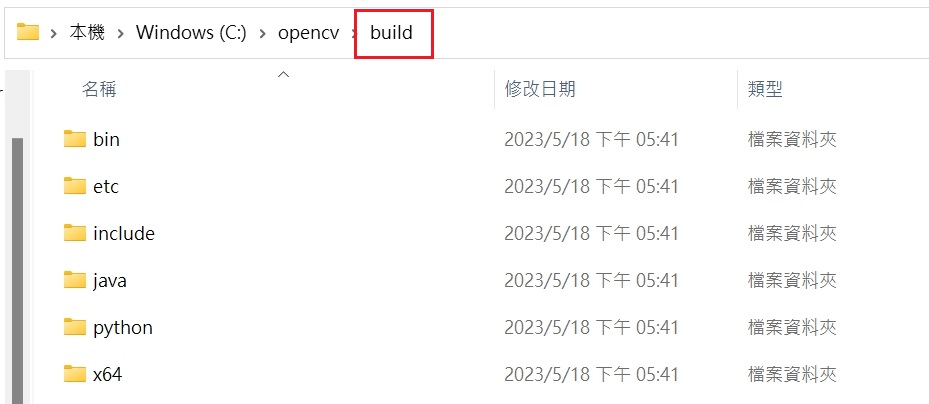
圖4:下載並解壓縮OpenCV
4. 在Visual Studio中配置專案屬性
在Visual Studio中配置專案屬性,主要是告訴 C++ 編譯器和連結器,OpenVINO和OpenCV的標頭檔以及資源檔在哪裡。
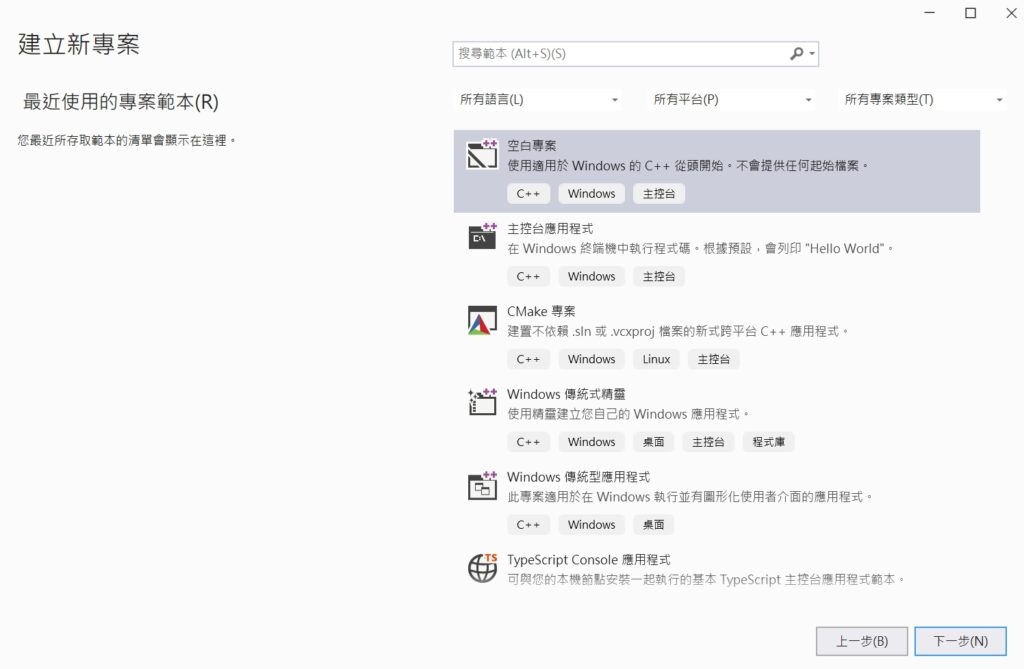
第一步,打開 Visual Studio 2022 Community,在「檔案(F)」功能表中選擇「新增(N)→專案(P)」,新建立一個C++空白專案。
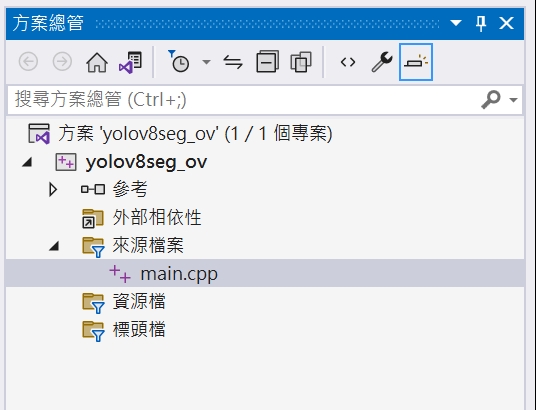
第二步,在「檔案(F)功能表」中選擇「新增(N)→檔案(F)」,新建一個 main.cpp 檔,添加到方案總管的來源檔案資料夾中。
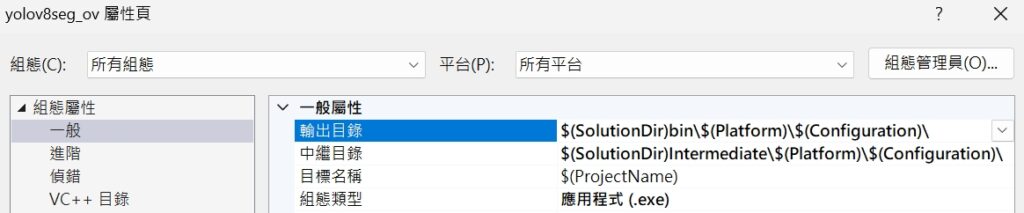
第三步,在「方案總管」中的專案名稱按右鍵,於功能表中選擇「屬性(R)」,啟動「屬性頁」對話方塊。
- 在「組態(C)」欄選擇「所有組態」,在「平台(P)」欄選擇「所有平台」;
- 在「輸出目錄」輸入:$(SolutionDir)bin\$(Platform)\$(Configuration)\
- 在「中繼目錄」輸入:$(SolutionDir)Intermediate\$(Platform)\$(Configuration)\
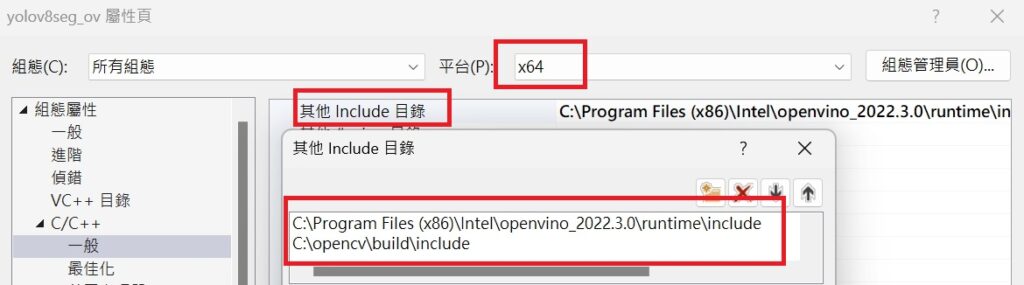
第四步,在「屬性頁」對話方塊中選擇「C/C++→一般」;在「平台(P)」欄選擇「x64」;在「其他Include目錄」中輸入:
- C:\Program Files (x86)\Intel\openvino_2022.3.0\runtime\include
- C:\opencv\build\include
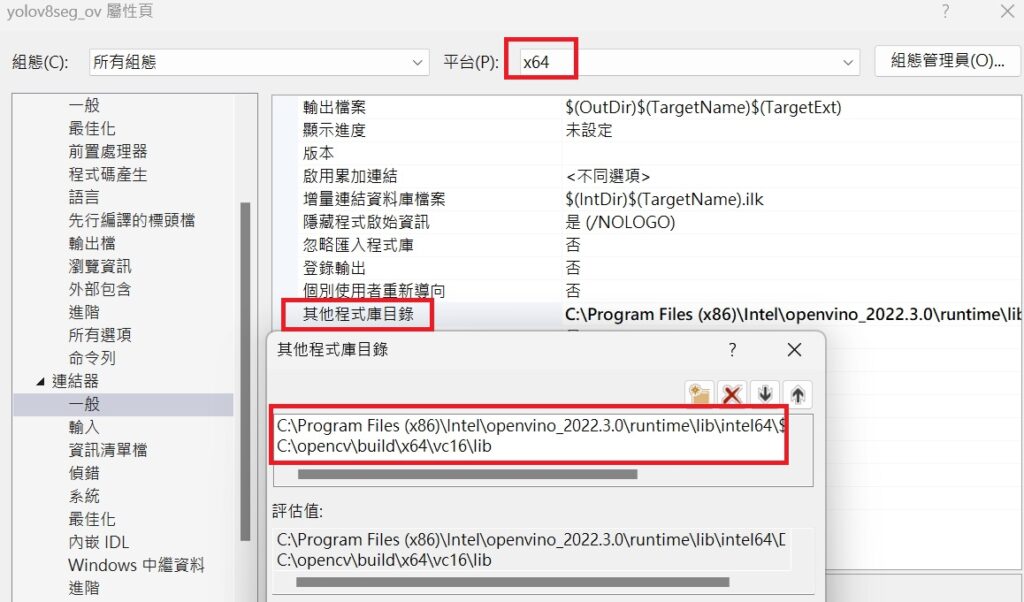
第五步,在「屬性頁」對話方塊中選擇「連結器→一般」;在「平台(P)」欄選擇「x64」;在「其他程式庫目錄」中輸入:
- C:\Program Files (x86)\Intel\openvino_2022.3.0\runtime\lib\intel64\$(Configuration)
- C:\opencv\build\x64\vc16\lib
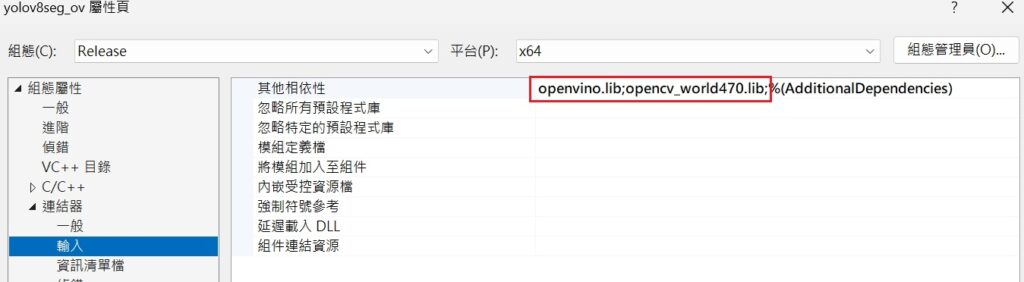
第六步,在「屬性頁」對話方塊中選擇「連結器→輸入」,在「組態(C)」欄選擇「Debug」,在「平台(P)」欄選擇「x64」,然後:
在「其他相依性」中添加:openvinod.lib;opencv_world470d.lib;
將「組態(C)」欄改為「Release」,然後:
在「其他相依性」中添加:openvino.lib;opencv_world470.lib;
(註 : 文章撰寫時https://opencv.org/
到此,完成在 Visual Studio 中配置 OpenVINO C++ 推論運算專案屬性。
5. 執行 OpenVINO C++ 範例程式
測試開發環境
首先,請將下面的程式碼複製到 main.cpp 中,原始程式碼下載地址:
https://gitee.com/ppov-nuc/yolov5_infer/blob/main/test_ov_opencv.cpp
#include
#include <openvino/openvino.hpp> //openvino header file
#include <opencv2/opencv.hpp> //opencv header file
int main(int argc, char* argv[]) {
// -------- Get OpenVINO runtime version --------
std::cout << ov::get_openvino_version().description << ':' << ov::get_openvino_version().buildNumber << std::endl;
// -------- Step 1. Initialize OpenVINO Runtime Core --------
ov::Core core;
// -------- Step 2. Get list of available devices --------
std::vector availableDevices = core.get_available_devices();
// -------- Step 3. Query and print supported metrics and config keys --------
std::cout << "Available devices: " << std::endl;
for (auto&& device : availableDevices) {
std::cout << device << std::endl;
}
// -------- Step 4. Read a picture file and show by OpenCV --------
cv::Mat img = cv::imread("zidane.jpg"); //Load a picture into memory
cv::imshow("Test OpenVINO & OpenCV IDE", img);
std::cout << "Image width: " << img.cols << " height: " << img.rows << std::endl;
cv::waitKey(0);
cv::destroyAllWindows();
return 0;
}
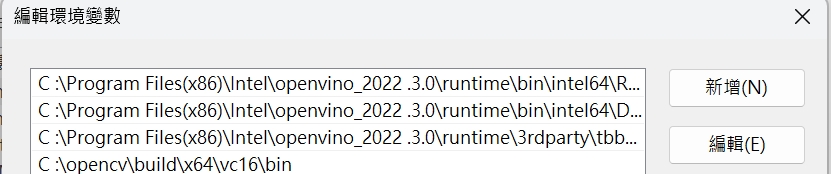
然後,將OpenCV和OpenVINO動態連結程式庫所在的位置,添加到path環境變數中。
- C :\Program Files(x86)\Intel\openvino_2022 .3.0\runtime\bin\intel64\Release
- C :\Program Files(x86)\Intel\openvino_2022 .3.0\runtime\bin\intel64\Debug
- C :\Program Files(x86)\Intel\openvino_2022 .3.0\runtime\3rdparty\tbb\bin
- C :\opencv\build\x64\vc16\bin
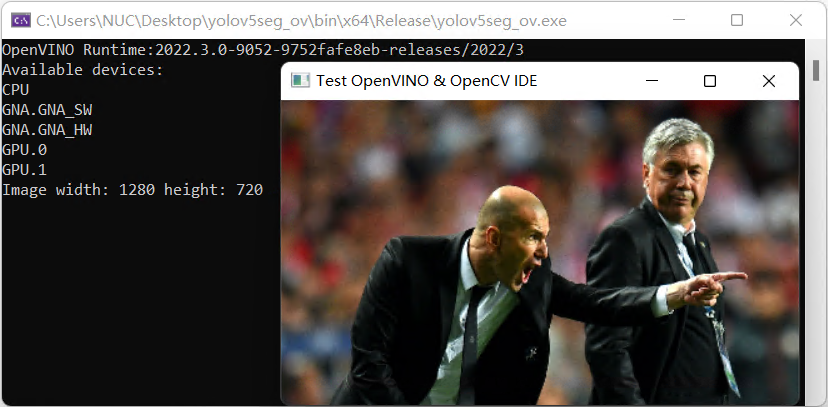
最後,編譯並執行上述程式碼,結果如下圖所示:
總結
本文詳述了從零開始在Windows上以Visual Studio為基礎,配置開發OpenVINO C++推論程式的全流程步驟,並提供了完整的測試程式碼test_ov_opencv.cpp。環境配置成功後,就可以開始用 C++ 編寫 OpenVINO 推論程式了。

- 在Windows平台以Visual Studio為基礎配置OpenVINO C++開發環境 - 2023/05/23
訂閱MakerPRO知識充電報
與40000位開發者一同掌握科技創新的技術資訊!


