作者:曾成訓(CH.Tseng)
average face 是一項有趣的電腦視覺技術,它可以將一批不同臉孔的圖片,計算出五官的平均後顯示出來,形成一張所謂的「大眾臉」,雖然有人將其翻譯成平均臉,但個人覺得大眾臉似乎更貼切。
這個技術並不稀奇,早在 2011 年,一位南非的旅行家 Mike 就曾經把他旅遊各地所拍攝的人像合成在一起,稱為「The Faces Of Tomorrow」。
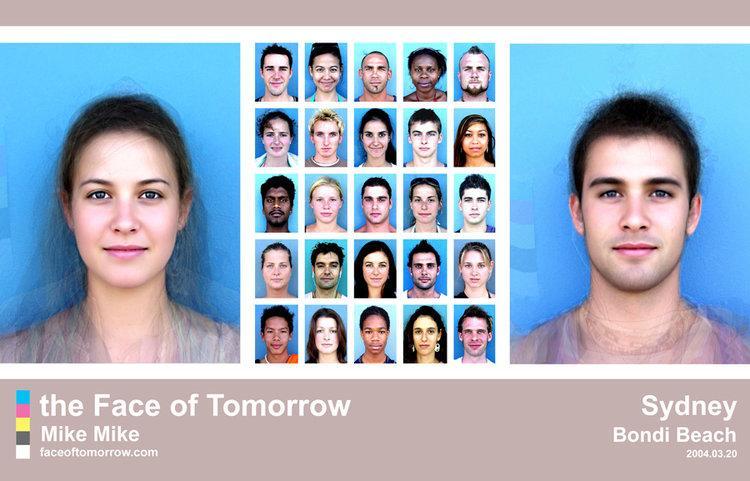
雪梨邦黛海灘(Bondi Beach, Sydney)遊客的平均臉(圖片來源:Business Insider)
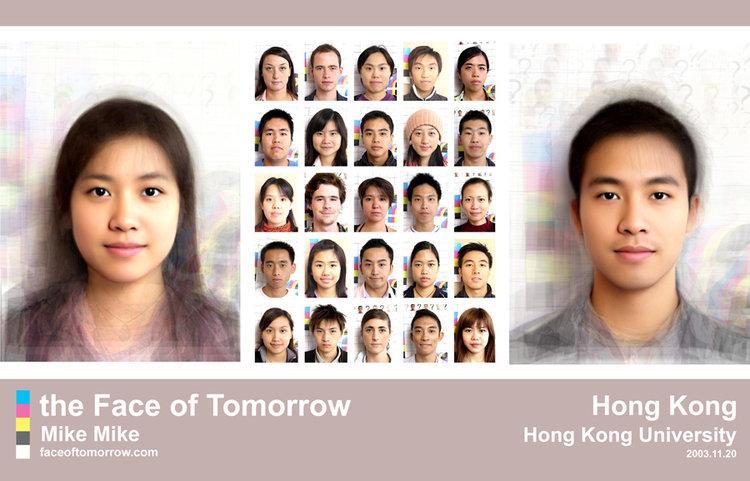
香港大學學生的平均臉(圖片來源:Business Insider)
此外,你應該還記得前幾年曾流行一時,由不同國家人民的臉孔所平均出來的代表圖像:
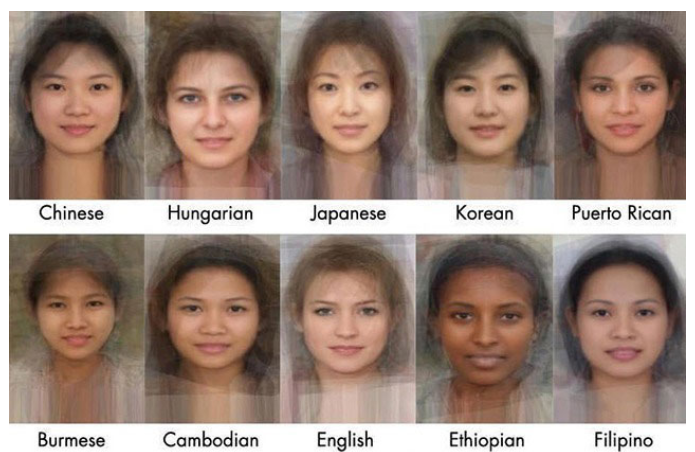
(圖片來源:faceresearch.org)
faceresearch.org 由蘇格蘭亞伯丁大學(the University of Aberdeen)心理學研究所所成立,是一個以臉部為主題的研究網站,當中包含了一個人臉平均的互動展示,您也可以試著玩看看。
認識 average face
透過 average face 技術,我們可以掌握如何:
- 偵測臉孔
- 取得臉部的 landmarks
- 取得 Delaunay_Triangulation或Voronoi_Diagrams
- 臉部不同區塊的合成
程式說明
下方的範例程式參考自 Satya Mallick PhD 的網路課程「Computer Vision for Faces 2018」 ,如果您有興趣,請上連結。
取得 landmarks
imagePaths 為存放所有人臉的 folder,下方程式可一張張取得每張人臉的 landmarks,並放置於 allPoints,圖片內容則放置於 images。
 for imagePath in imagePaths:
    im = cv2.imread(imagePath)
    if im is None:
      print("image:{} not read properly".format(imagePath))
    else:
        points = fbc.getLandmarks(faceDetector, landmarkDetector, cv2.cvtColor(im, cv2.COLOR_BGR2RGB))
        if len(points) > 0:
          allPoints.append(points)

          im = np.float32(im)/255.0
          images.append(im)
        else:
          print("Couldn't detect face landmarks")
另外,除了人臉當中的 68 個 landmarks,我們還需要加上圖片邊框上的 8 個點,這樣在最後合成人像時,才會有比較完整的大頭照,而非僅是臉部的五官區域;在原有的 68 點 landmarks 再加入 8 個點的方式是:(boundaryPoints🡪8 個新點)
New_landmarks = np.concatenate((landmark_points, boundaryPoints), axis=0)
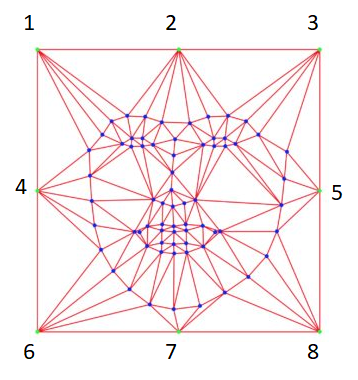
(圖片來源:曾成訓提供)
New_landmarks = np.concatenate((landmark_points, boundaryPoints), axis=0)

# Dimensions of output image
  w = 600
  h = 600
boundaryPts = fbc.getEightBoundaryPoints(h, w)
臉孔坐標定位
normalizeImagesAndLandmarks() 這個 function 指的是參考每張臉孔的 landmarks,將各個臉部圖片依新的 landmarks 值定位於該坐標點,例如範例中左眼左上方的 landmarks 會固定於(0.3 * w, h/3),右眼右上角則位於(0.7 * w, h / 3),其中 w、h 指的是最終輸出圖片的寬與高。
for i, img in enumerate(images):
    points = allPoints[i]
    points = np.array(points)

    img, points = fbc.normalizeImagesAndLandmarks((h, w), img, points)

    # Calculate average landmark locations
    pointsAvg = pointsAvg + (points / (1.0*numImages))

    # Append boundary points. Will be used in Delaunay Triangulation
    points = np.concatenate((points, boundaryPts), axis=0)

    pointsNorm.append(points)
    imagesNorm.append(img)
function:normalizeImagesAndLandmarks
def normalizeImagesAndLandmarks(outSize, imIn, pointsIn):
  h, w = outSize

  eyecornerSrc = [pointsIn[36], pointsIn[45]]
  eyecornerDst = [(np.int(0.3 * w), np.int(h/3)),
                  (np.int(0.7 * w), np.int(h/3))]

  tform = similarityTransform(eyecornerSrc, eyecornerDst)
  imOut = np.zeros(imIn.shape, dtype=imIn.dtype)

  imOut = cv2.warpAffine(imIn, tform, (w, h))
  points2 = np.reshape(pointsIn, (pointsIn.shape[0], 1, pointsIn.shape[1]))
  pointsOut = cv2.transform(points2, tform)
  pointsOut = np.reshape(pointsOut, (pointsIn.shape[0], pointsIn.shape[1]))

  return imOut, pointsOut
最終定位好的 72 個 landmarks(含邊框 8 個)以及臉部圖片,放置於 pointsNorm 以及 imagesNorm。
取得 delaunay 三角剖分區域
calculateDelaunayTriangles function 只需要輸出圖的 shape 以及定位點 list,便可輸出其 delaunay triangulation areas。
dt = fbc.calculateDelaunayTriangles(rect, pointsAvg)
function: calculateDelaunayTriangles
def calculateDelaunayTriangles(rect, points):
  subdiv = cv2.Subdiv2D(rect)

  for p in points:
    subdiv.insert((p[0], p[1]))

  triangleList = subdiv.getTriangleList()
  delaunayTri = []

  for t in triangleList:
    pt = []
    pt.append((t[0], t[1]))
    pt.append((t[2], t[3]))
    pt.append((t[4], t[5]))

    pt1 = (t[0], t[1])
    pt2 = (t[2], t[3])
    pt3 = (t[4], t[5])

    if rectContains(rect, pt1) and rectContains(rect, pt2) and rectContains(rect, pt3):
      ind = []
      for j in range(0, 3):
        for k in range(0, len(points)):
          if(abs(pt[j][0] - points[k][0]) < 1.0 and abs(pt[j][1] - points[k][1]) < 1.0):
            ind.append(k)

      if len(ind) == 3:
        delaunayTri.append((ind[0], ind[1], ind[2]))

  return delaunayTri
合成臉部圖片
output 為輸出的最終圖片,而 warpImage function 在輸入了原圖、原 landmarks、定位後的 landmarks 以及上一步所取得的 dt(delaunay triangulation)資訊後,便能將原圖的各個 delaunay triangulation area 變形為定位後的 delaunay triangulation area,最後再將每張變形後的 delaunay triangulation area 拼接回臉部圖形,即完成。
output = np.zeros((h, w, 3), dtype=np.float)

  # Warp input images to average image landmarks
  for i in range(0, numImages):
    imWarp = fbc.warpImage(imagesNorm[i], pointsNorm[i], pointsAvg.tolist(), dt)
    output = output + imWarp
此 function 針對輸入 delaunay point list 進行變形:
def warpImage(imIn, pointsIn, pointsOut, delaunayTri):
  h, w, ch = imIn.shape
  # Output image
  imOut = np.zeros(imIn.shape, dtype=imIn.dtype)

  for j in range(0, len(delaunayTri)):
    tin = []
    tout = []

    for k in range(0, 3):
      # Extract a vertex of input triangle
      pIn = pointsIn[delaunayTri[j][k]]
      pIn = constrainPoint(pIn, w, h)

      # Extract a vertex of the output triangle
      pOut = pointsOut[delaunayTri[j][k]]
      pOut = constrainPoint(pOut, w, h)

      tin.append(pIn)
      tout.append(pOut)
區塊變形指令使用的是 cv2.estimateRigidTransform,但要注意,目前版本的 OpenCV 已不支援,須改用cv2.estimateAffinePartial2D 來替代。
tform = cv2.estimateRigidTransform(np.array([inPts]), np.array([outPts]), False)
改為
tform,_ = cv2.estimateAffinePartial2D(np.array([inPts]), np.array([outPts]))
輸入前後兩種 point list,回傳的 tform 就是 cv2.warpAffine的affine transformation 參數。
imOut = cv2.warpAffine(imIn, tform, (w, h))
小結
大家猜猜這兩位是誰?
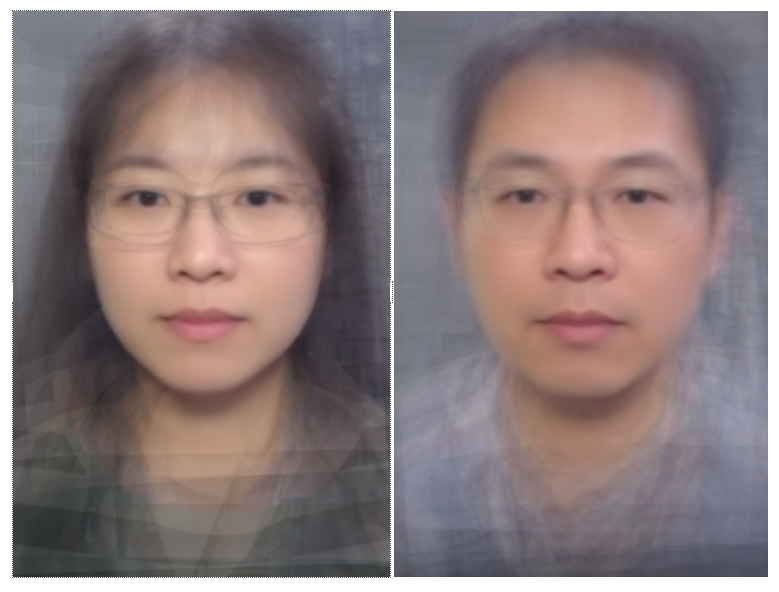
(圖片來源:曾成訓提供)
實際上並不存在這兩個人,他們是由下面這些公司男女同仁平均而成的臉:
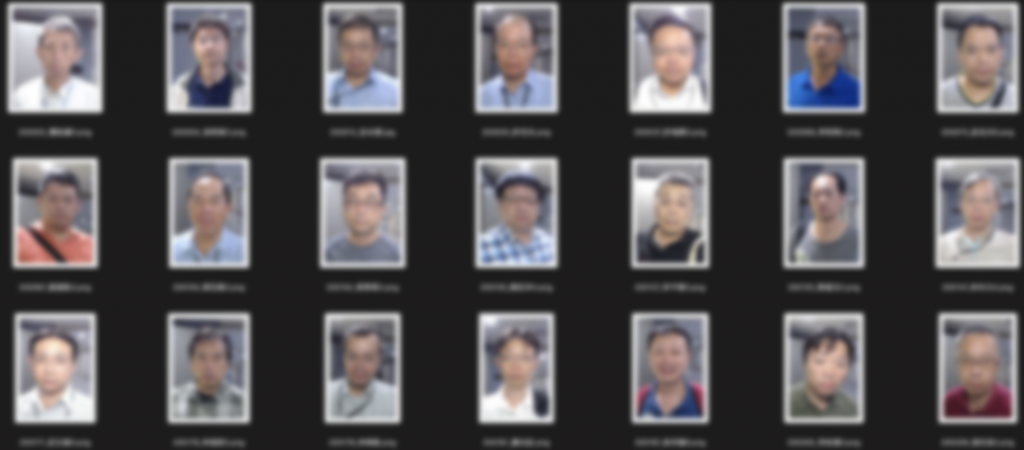
(圖片來源:曾成訓提供)

(圖片來源:曾成訓提供)
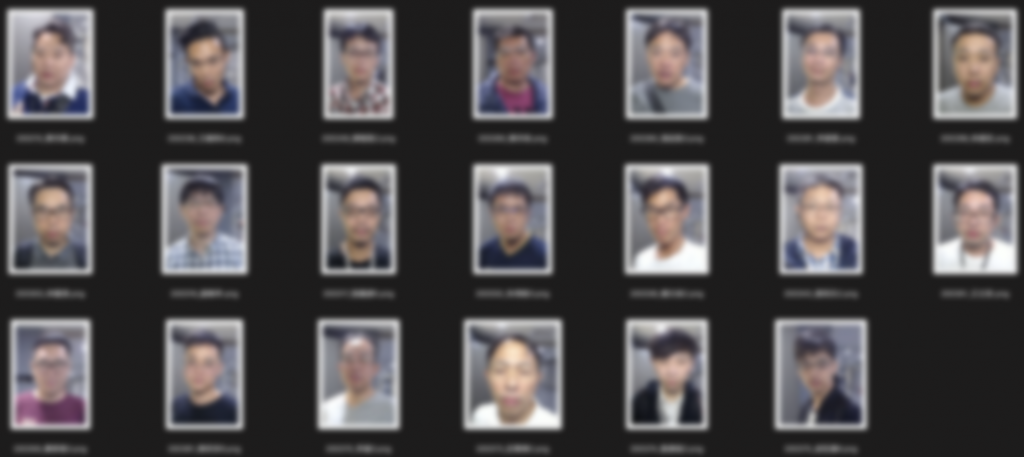
(圖片來源:曾成訓提供)
由於合成的臉部是經過校準及對稱的,因此這種對齊後的五官組合起來通常讓人感覺端正美觀,也就是符合一般人所稱的俊男美女的特色。
(本文經作者同意轉載自 CH.TSENG 部落格、原文連結;責任編輯:賴佩萱)

- 【模型訓練】訓練馬賽克消除器 - 2020/04/27
- 【AI模型訓練】真假分不清!訓練假臉產生器 - 2020/04/13
- 【AI防疫DIY】臉部辨識+口罩偵測+紅外線測溫 - 2020/03/23
訂閱MakerPRO知識充電報
與40000位開發者一同掌握科技創新的技術資訊!


