作者:柯大
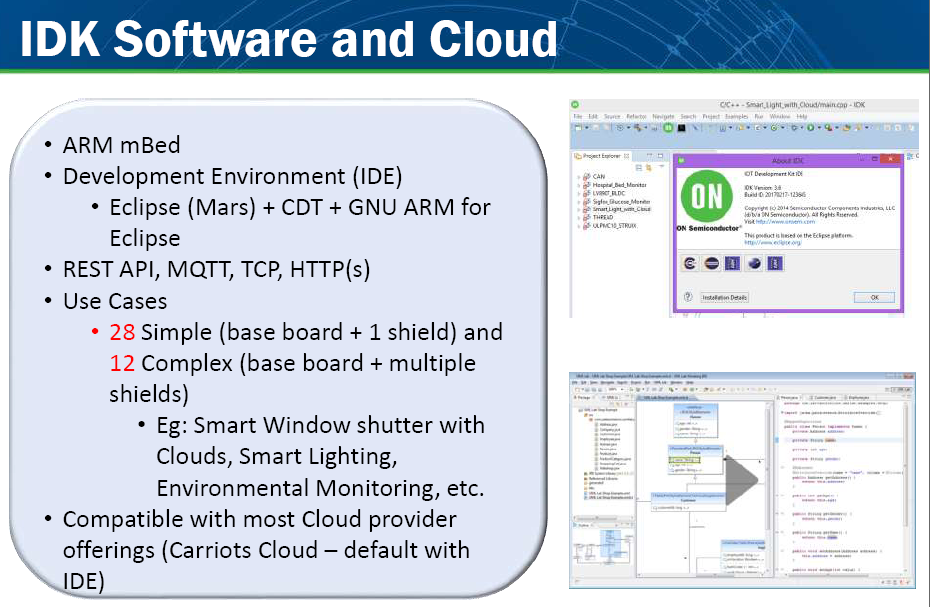
最近到手一塊新的物聯網開發套件,是由ON Semi這家美國電子零件商所推出的,套件名稱叫做IoT Development Kit (簡稱IDK)。在測試之後發現,它提供的軟硬體開發環境相當完整,對Maker也算友善(支援標準Arduino介面),更有意思的是它支援ARM的mbed OS開發平台,順便熟悉一下,確實有其獨到之處。
IDK可支援多種應用,包含內容如下圖所示:
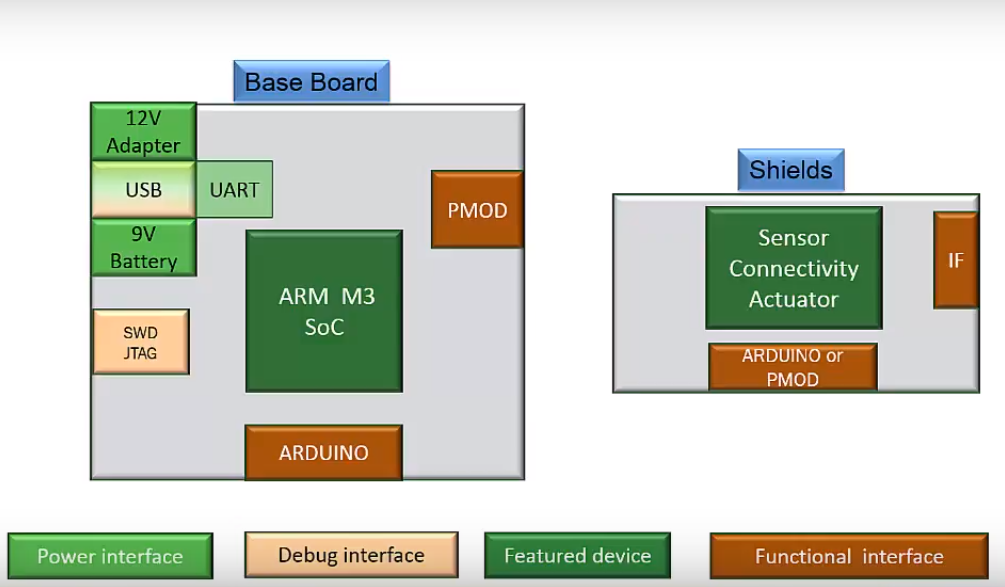
硬體開發板與擴充模組及感測器介面結構說明圖(圖片來源:柯大提供)
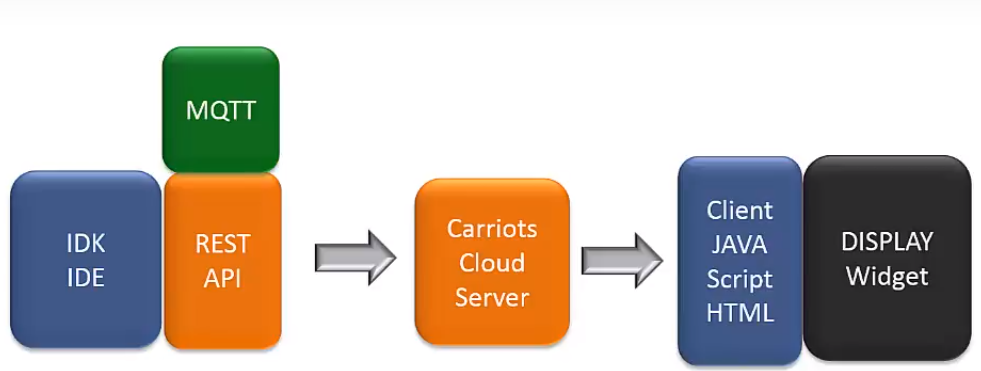
物聯網開發通訊協議及雲端平台架構(圖片來源:柯大提供)
完整ARM mbed IoT Develiopment Kit 開發套件架構(圖片來源:柯大提供)
安裝IDK開發環境及測試範例
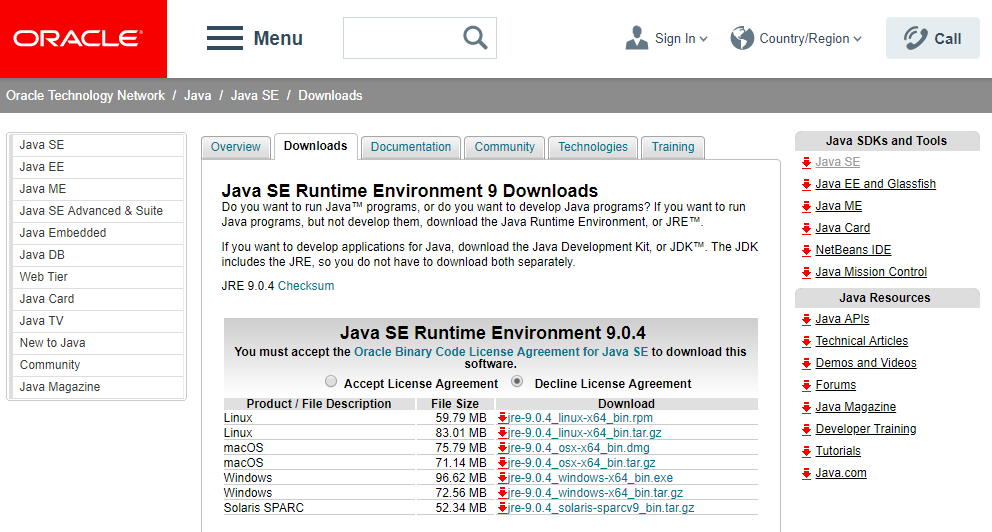
(一)安裝Java Runtime Environment (JRE)
下載JRE安裝包並安裝
(二)安裝Installing GNU GCC Toolchain
下載 BB−GEVK−SOFTWARE.zip並解壓縮後安裝,再執行 Gnutoolchain.exe 安裝程式。

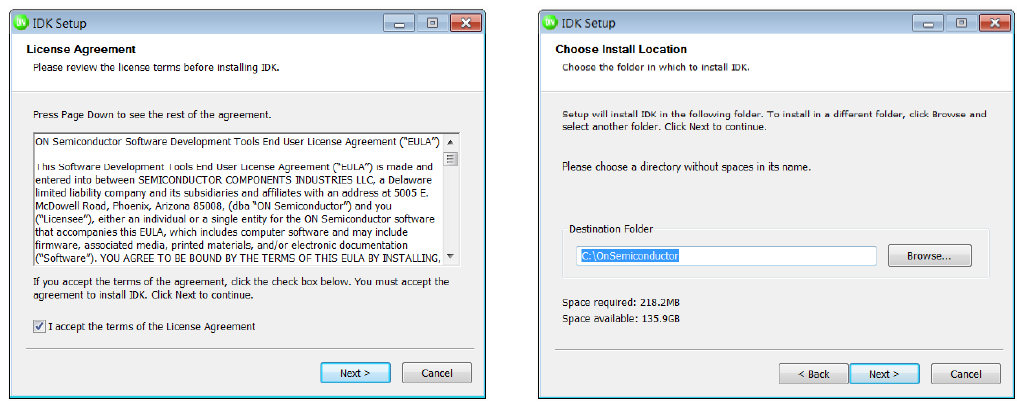
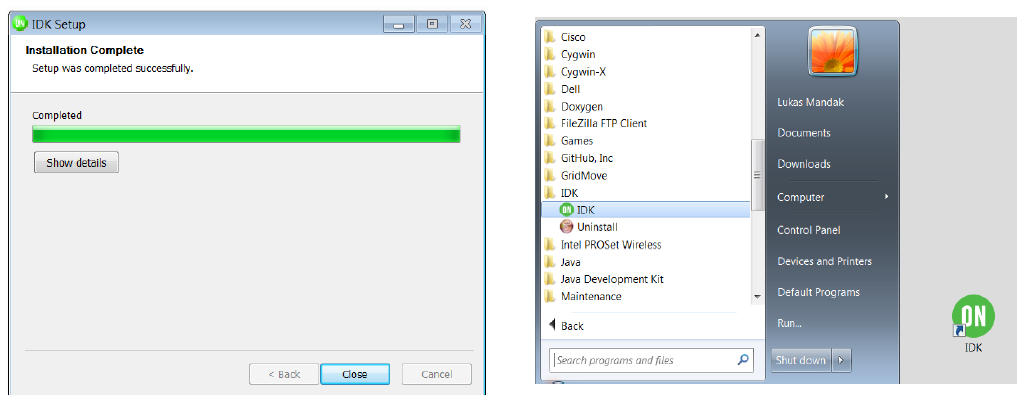
(三)安裝 IoT IDK 開發環境軟體
- Windows 64 bit Java JRE:IDK_installer_x86_64.exe
- Windows 32 bit Java JRE:IDK_installer_x86.exe

(四)測試第一個範例
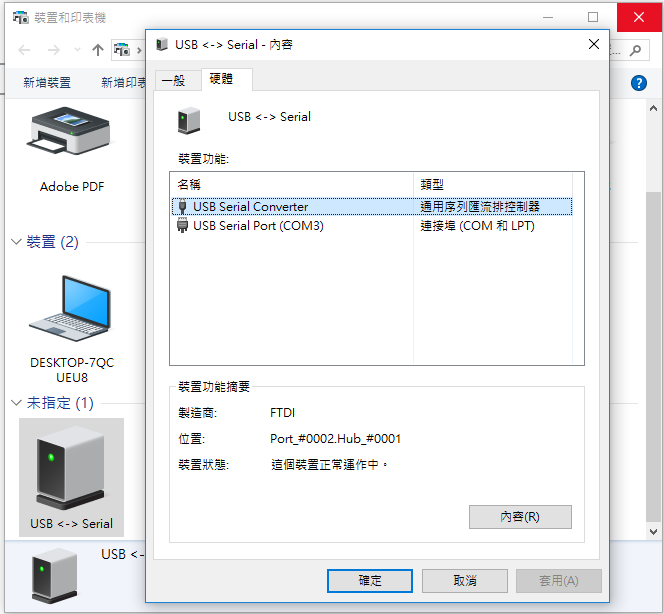
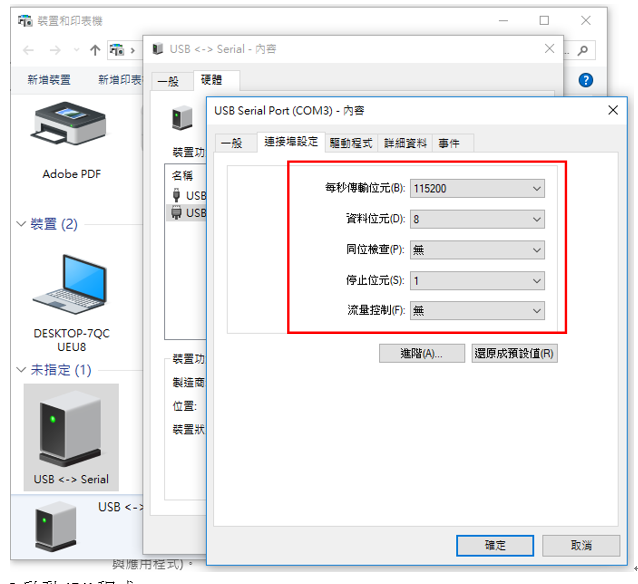
- 確認USB通訊埠COM Port:進入裝置管理員查詢COM Port是不是COM3
 2. 設定COM Port 傳輸參數 : 115200 N 8 1
3. 啟動IDK程式
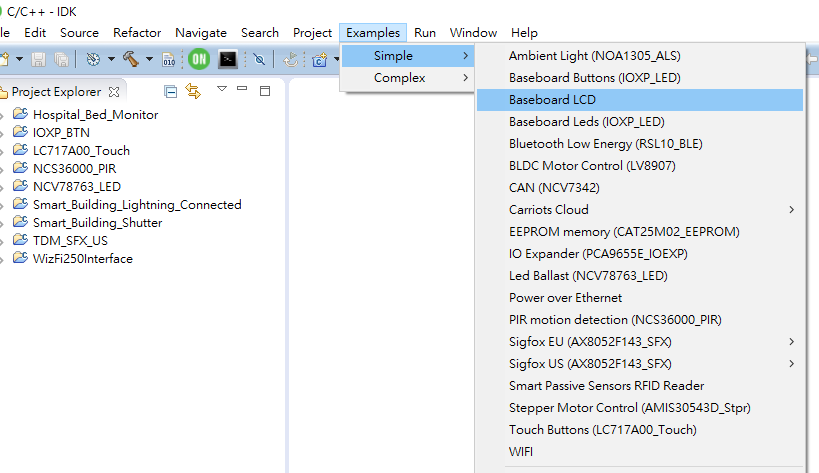
開啟第一個範例程式測試:Examples =>Simple => Baseboard LCD
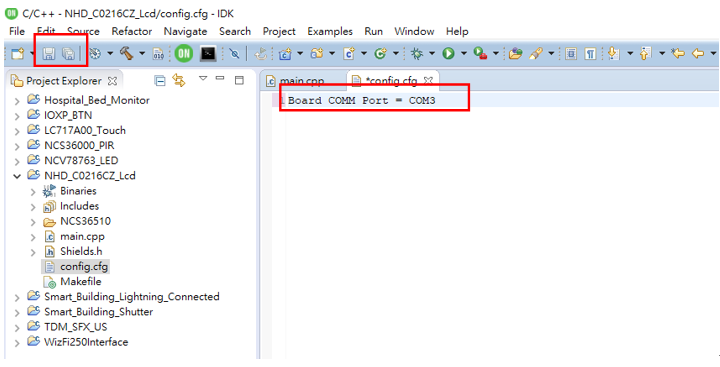
4. 修改COM Port為所取得USB驅動正確的COM3,並按儲存鍵
5. 修改程式內容字串
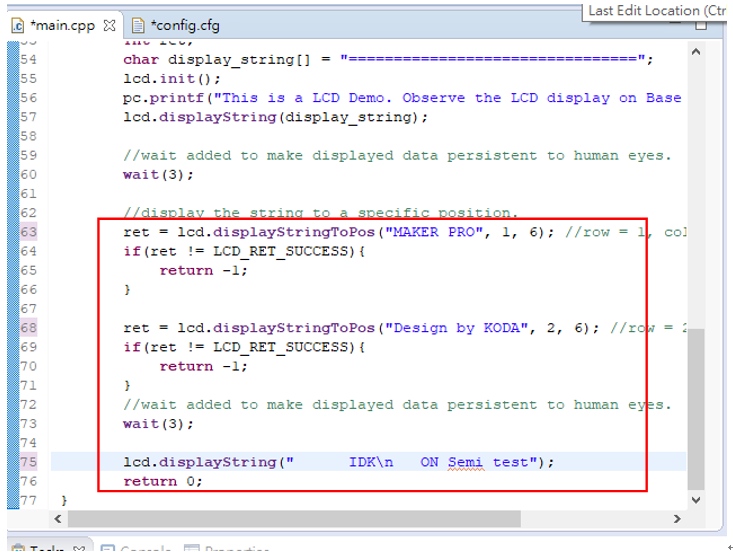
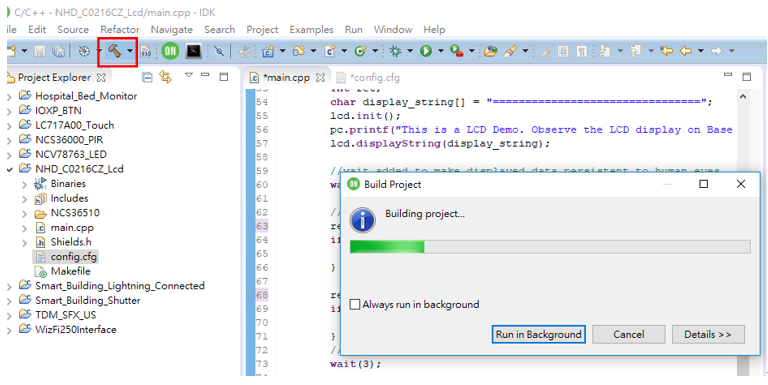
6. 執行編譯範例程式
7. 執行燒錄程式程式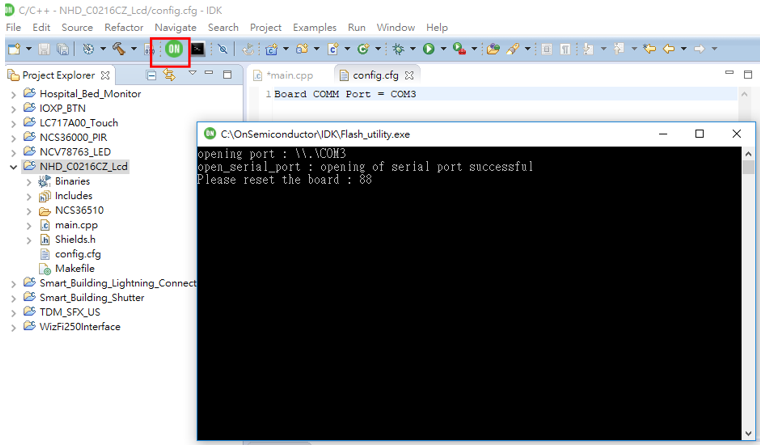
8. 按下<Reset>鍵開始燒錄
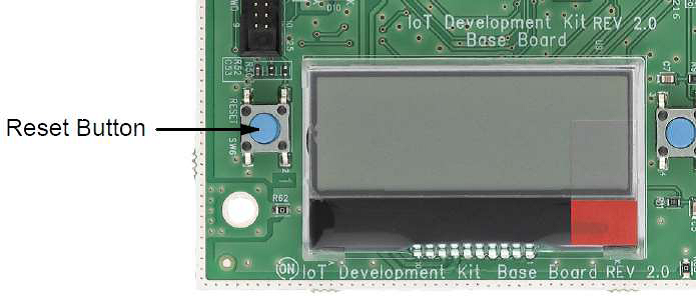
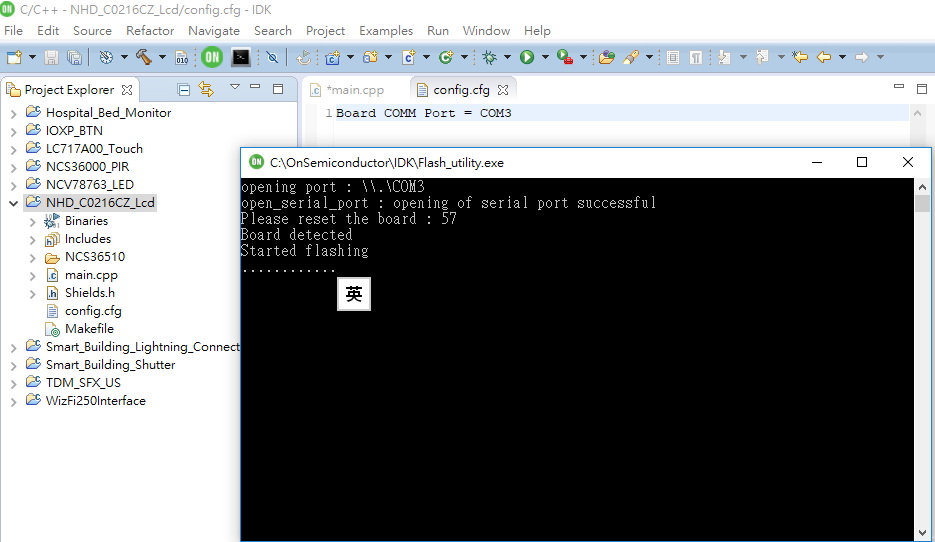
9.燒錄完成再按下<Reset>鍵,重新啟動開發板

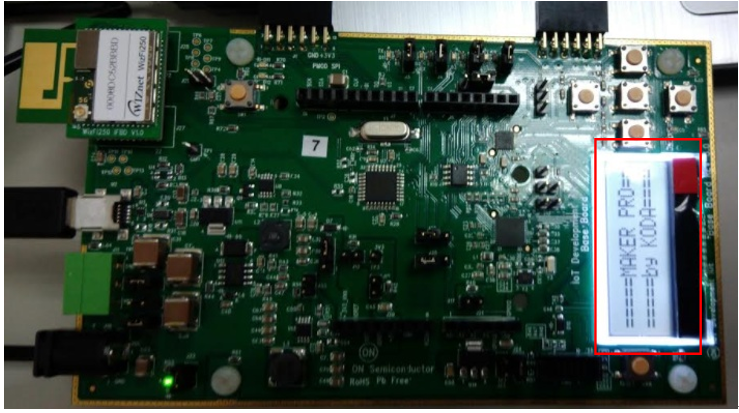
10. 執行結果
main.cpp 原始程式
// —————————————————————————————
// 1. This is a sample LCD application demonstrating displying of characters
// on LCD.
//
// 2. LCD is already mounted on the baseboard.
//
// 3. For hardware and software capabilities/limitations kindly refer the
// help page of LCD in IDE.
//
// 4. If the application has detailed logs, it is advisable to check the
// serial console of the computer. To open the serial console use the
// following settings,
// Baud rate: 115200
// Data bits: 8
// Stop bits: 1
// Parity: None
// Flow control: None
// The above settings has been tested and verified on serial client putty.
//
// 5. If idle while loop is used in the project, then it is recommended to use
// a wait of 1 second to allow other threads/callbacks to run and get
// processed in time.
// —————————————————————————————
#include “mbed.h”
#include “Shields.h”
/*******************************************************************************
* CLASS INSTANCE DECLARATION
******************************************************************************/
NHD_C0216CZ lcd;
//initializing the serial console instance.
Serial pc(USBTX,USBRX);
int main()
{
int ret;
char display_string[] = “================================”;
lcd.init();
pc.printf(“This is a LCD Demo. Observe the LCD display on Base Board for Demo.\r\n”);
lcd.displayString(display_string);
//wait added to make displayed data persistent to human eyes.
wait(3);
//display the string to a specific position.
ret = lcd.displayStringToPos(“MAKER PRO”, 1, 4); //row = 1, column = 6 of LCD.
if(ret != LCD_RET_SUCCESS){
return -1;
}
ret = lcd.displayStringToPos(“by KODA”, 2, 5); //row = 2, column = 6 of LCD.
if(ret != LCD_RET_SUCCESS){
return -1;
}
//wait added to make displayed data persistent to human eyes.
wait(2);
lcd.displayString(“IoT DVK by WPI!\nON Semi IDK Test”);
wait(0.5);
lcd.displayString(” \n\n”);
wait(0.5);
lcd.displayString(“IoT DVK by WPI!\nON Semi IDK Test”);
wait(0.5);
lcd.displayString(” \n\n”);
wait(0.5);
lcd.displayString(“IoT DVK by WPI!\nON Semi IDK Test”);
wait(0.5);
lcd.displayString(” \n\n”);
wait(0.5);
lcd.displayString(“IoT DVK by WPI!\nON Semi IDK Test”);
return 0;
}
(責任編輯:廖庭儀)

- 【開箱評測】MTDuino IOT開發板: MQTT功能實作介紹 - 2023/06/26
- 【開箱評測】MTDuino IOT開發板:NB-IoT及GPS功能介紹 - 2023/05/07
- 用NB-IoT USB Dongle實現MQTT,加快IoT應用開發 - 2019/12/18
訂閱MakerPRO知識充電報
與40000位開發者一同掌握科技創新的技術資訊!


