作者:Ches拔
在先前已經寫過一篇使用Linkit 7697打造遠端遙控智能燈座,而這一篇是第二部分。這次手作了35 PCS課堂上使用,包括11月Maker Faire Taipei展覽樣品:
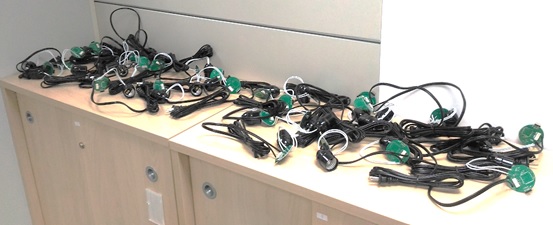
和鎢絲燈泡一起打包過後,就像準備出貨,只是難看了點:

工作桌凌亂不堪,但為了就是讓學員一次就上手!特地準備了九支程式、電路圖說明與Layout走線,要在三小時完全學會,而且當天會有小鮮肉助教,把教材給他之後,我就可以喝飲料看漫畫了。希望之後大家上完整個系列課程之後,大家能多多關心自己家中的長輩 。

以下程式可以按下d、a、b調光
操作影片如下:
給大家需要的公式:
int PWM = 9; // PWM pin
int dimming = 40; // Dimming level (0-128) 0 = ON, 128 = OFF
int flag1=0,flag2=0,flag3=0;
void setup(){
Serial.begin(9600);
pinMode(2, INPUT);
pinMode(pinLed, OUTPUT);
analogWrite(PWM, 55); //setting PWM speed
Serial.println(“Hello”);
}
void loop(){
int switchStatus = digitalRead(2);
String s = “”;
while (Serial.available()) {
char c = (char) Serial.read();
if(c!=’\n’)
{
s += c;
}
delay(1);
}
if(s==”d”){
flag1=1;
flag2=0;
flag3=0;
dimming=40;
Serial.println(s);
}
if(s==”a”){
flag2=1;
flag1=0;
flag3=0;
dimming=30;
Serial.println(s);
}
if(s==”b”){
flag3=1;
flag2=0;
flag1=0;
Serial.println(s);
}
if(switchStatus==HIGH && flag1==1)
{
Serial.println(“ddd”);
int dimtime = (65*dimming); // For 60Hz =>65
delayMicroseconds(dimtime); // Wait till firing the TRIAC
digitalWrite(pinLed , HIGH); // Fire the TRIAC
delayMicroseconds(8.33); // triac On propogation delay
// (for 60Hz use 8.33) Some Triacs need a longer period
digitalWrite(pinLed, LOW); // No longer trigger the TRIAC (the next zero crossing will swith it off) TRIAC
}
if(switchStatus==HIGH && flag2==1)
{
Serial.println(“aaa”);
int dimtime = (65*dimming); // For 60Hz =>65
delayMicroseconds(dimtime); // Wait till firing the TRIAC
digitalWrite(pinLed , HIGH); // Fire the TRIAC
delayMicroseconds(8.33); // triac On propogation delay
// (for 60Hz use 8.33) Some Triacs need a longer period
digitalWrite(pinLed, LOW); // No longer trigger the TRIAC (the next zero crossing will swith it off) TRIAC
}
if(switchStatus==HIGH && flag3==1)
{
Serial.println(“bbb”);
digitalWrite(pinLed, LOW); // No longer trigger the TRIAC (the next zero crossing will swith it off) TRIAC
}
}
以下程式可以做出AC呼吸燈泡模式
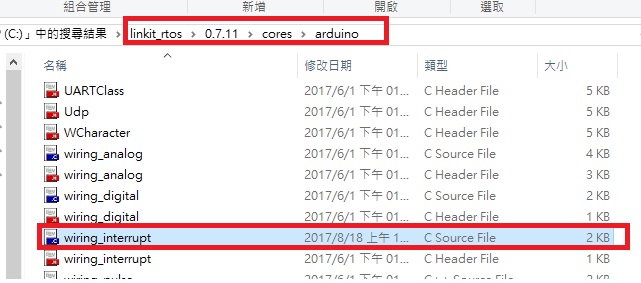
將%Localappdata%\Arduino15\packages\LinkIt\hardware\linkit_rtos\0.8.4\cores\arduino\wiring_interrupt.c
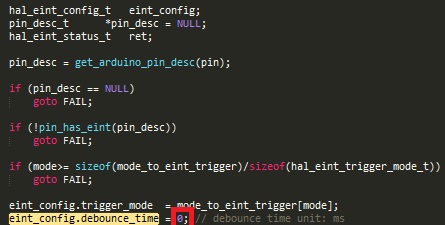
裡面的eint_config.debounce_time = 50; // debounce time unit: ms
50改為0

可以在C槽中找
操作影片如下:
下面是需要的公式:
int flag = 0;
int dimming = 128; // Dimming level (0-128) 0 = ON, 128 = OFF
int brightness = 40; // how bright the LED is
int fadeAmount = 1; // how many points to fade the LED by
void setup()
{
pinMode(pinLed, OUTPUT);
attachInterrupt(2, interrupt, RISING); //using interrupt
Serial.begin(9600);
}
void loop()
{
if (flag == 1 )
{
// change the brightness for next time through the loop:
brightness = brightness + fadeAmount;
dimming=brightness;
Serial.println(brightness);
int dimtime = (65*dimming); // For 60Hz =>65
delayMicroseconds(dimtime); // Wait till firing the TRIAC
digitalWrite(pinLed, HIGH); // Fire the TRIAC
delayMicroseconds(8.33); // triac On propogation delay
// (for 60Hz use 8.33) Some Triacs need a longer period
digitalWrite(pinLed, LOW); // No longer trigger the TRIAC (the next zero crossing will swith it off) TRIAC
// reverse the direction of the fading at the ends of the fade:
if (brightness <= 10 || brightness >= 100)
{
fadeAmount = -fadeAmount;
}
flag = 0;
}
}
void interrupt()
{
flag = 1;
}
這次是初階課程,如果控制30顆燈泡同時閃爍或亮滅,會挺壯觀,但可惜的是,MQTT要等到進階課程才會教到。
(本文同步發表於作者部落格 — 物聯網學習筆記,文章連結;責任編輯:葉于甄。)
◎加入我們的Line,獲得更多及時文章更新&活動資訊→


- 【育教於樂】我家日常的康達效應 - 2019/04/25
- 【Tutorial】一起走進 ROS 的世界吧(5) - 語音辨識篇 - 2018/12/26
- 【Tutorial】一起走進 ROS 的世界吧(4) — 視覺辨識篇 - 2018/11/14
訂閱MakerPRO知識充電報
與40000位開發者一同掌握科技創新的技術資訊!


