作者:曹永忠
智慧家庭的另一個核心技術是電源,如何控制電力供應則是智慧家庭的核心技術與關鍵資源,所以讓Ameba連網控制家庭電力供應,變成物聯網重要的基礎能力,如果能用物聯網神器Ameba開發板建構一個網頁伺服器,讓使用者在使用電腦、行動裝置…等等時,透過簡單好用的瀏覽器,輕易控制電力開關,那該有多好?本文將教您使用Ameba建構電力控制的網頁,只要用滑鼠輕輕一點,就可以控制電力開關。
組立繼電器的步驟
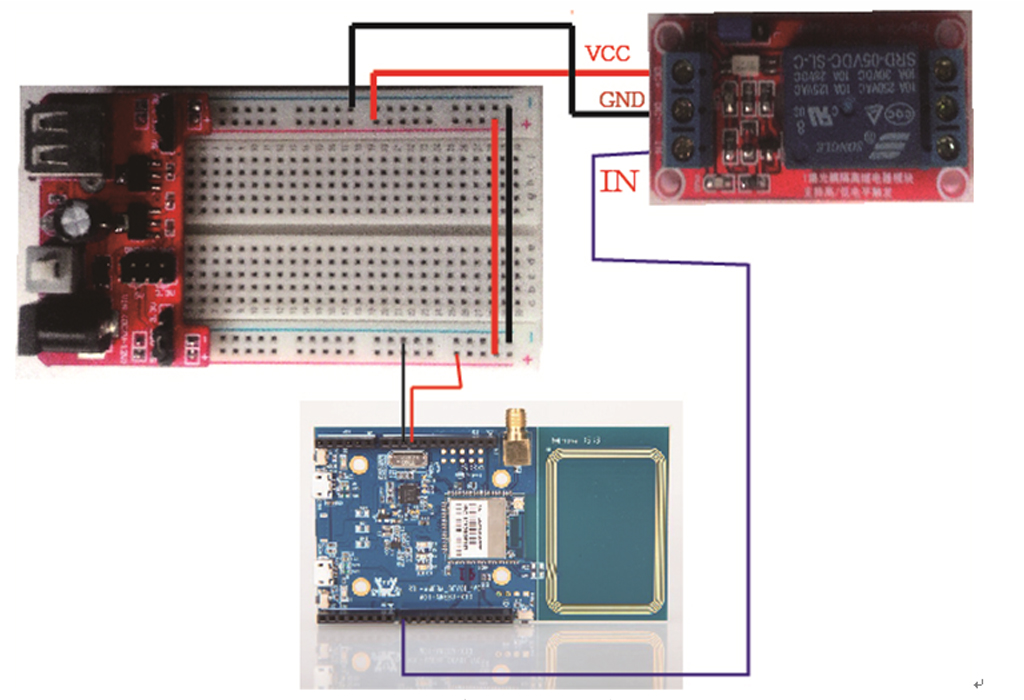
第一步:我們將取出圖(a)的繼電器模組,將DC+端(+5V/VCC)使用雙公杜邦線插入後,另一端插於麵包板兩端紅線那邊的插孔;再將DC-端(GND)使用雙公杜邦線插入,另一端則插於麵包板兩端藍線那邊的插孔,如圖(c),便可完成繼電器模組的電力供應。
第二步:我們將取出如圖(a)的繼電器模組,將IN端使用雙公杜邦線插入後,另一端插於Ameba開發板的D8腳位(Digital Input Pin 8),如圖(b),便也完成繼電器模組的控制電路。
繼電器電路安裝圖如下:
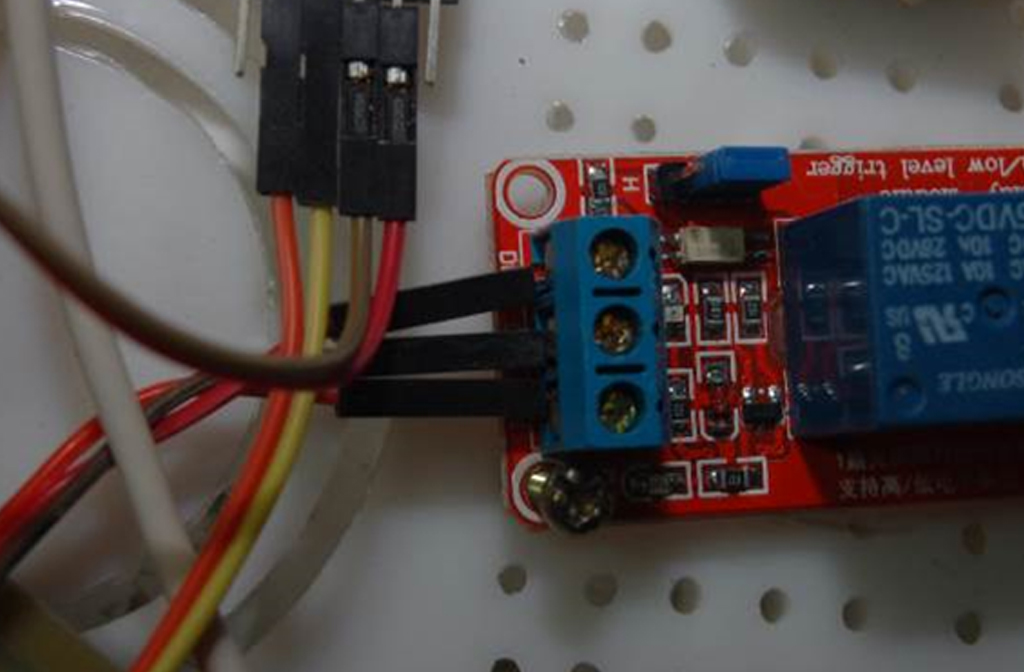
(a)繼電器輸入端
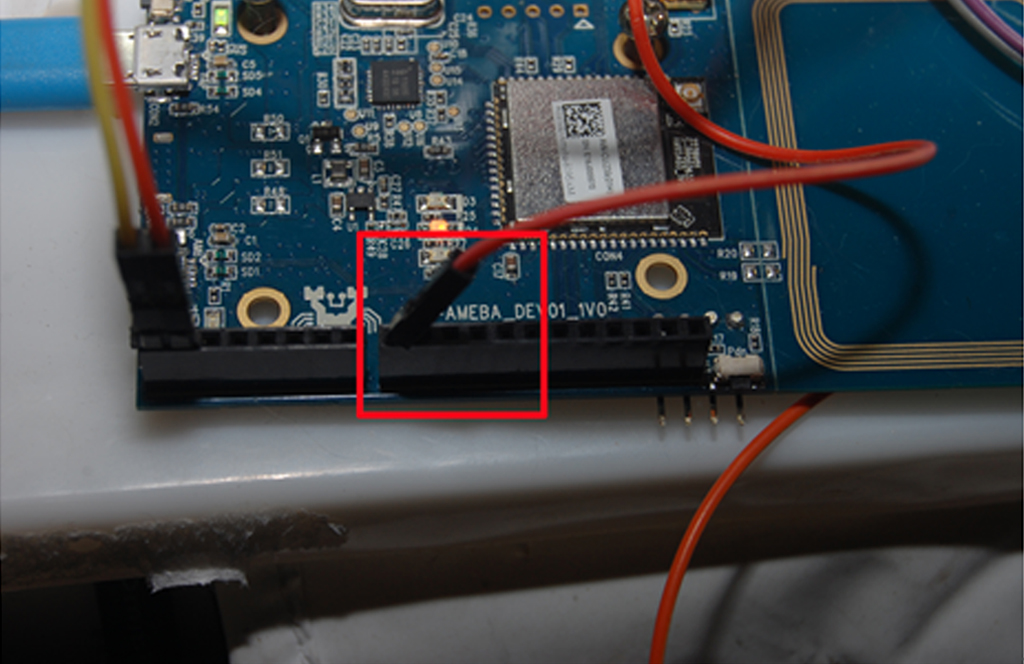
(b)繼電器輸入接D8
(c)繼電器輸入接法
透過網頁控制繼電器模組
所以接下來,要教讀者如何透過Ameba,使用WIFI模組與TCP/IP方式,建立網頁伺服器,並透過網頁方式來控制繼電器模組開與關。
將Ameba開發板的驅動程式安裝好之後,打開Ameba開發工具「Sketch IDE整合開發軟體」,撰寫一些程式,經由網頁控制繼電器模組測試程式,就可以透過Ameba Wi-fi模組建立網頁,控制繼電器模組開與關,透過網頁控制繼電器模組測試程式如下:
透過網頁控制繼電器模組測試程式 (WebServerControlRelay)
#include
char ssid[] = "linkitone"; // your network SSID (name)
char pass[] = ""; // your network password
int keyIndex = 0; // your network key Index number (needed only for WEP)
int status = WL_IDLE_STATUS;
WiFiServer server(80);
#define RelayPin 8
#define Turnon HIGH
#define Turnoff LOW
void setup() {
Serial.begin(9600); // initialize serial communication
pinMode(RelayPin, OUTPUT); // set the LED pin mode
// check for the presence of the shield:
if (WiFi.status() == WL_NO_SHIELD) {
Serial.println("WiFi shield not present");
while (true); // don't continue
}
String fv = WiFi.firmwareVersion();
if (fv != "1.1.0") {
Serial.println("Please upgrade the firmware");
}
// attempt to connect to Wifi network:
while (status != WL_CONNECTED) {
Serial.print("Attempting to connect to Network named: ");
Serial.println(ssid); // print the network name (SSID);
// Connect to WPA/WPA2 network. Change this line if using open or WEP network:
status = WiFi.begin(ssid); //no pass
// status = WiFi.begin(ssid, pass); //wpa use
// wait 10 seconds for connection:
delay(10000);
}
server.begin(); // start the web server on port 80
printWifiStatus(); // you're connected now, so print out the status
}
void loop() {
WiFiClient client = server.available(); // listen for incoming clients
if (client) { // if you get a client,
Serial.println("new client"); // print a message out the serial port
String currentLine = ""; // make a String to hold incoming data from the client
while (client.connected()) { // loop while the client's connected
if (client.available()) { // if there's bytes to read from the client,
char c = client.read(); // read a byte, then
Serial.write(c); // print it out the serial monitor
if (c == '\n') { // if the byte is a newline character
// if the current line is blank, you got two newline characters in a row.
// that's the end of the client HTTP request, so send a response:
if (currentLine.length() == 0) {
// HTTP headers always start with a response code (e.g. HTTP/1.1 200 OK)
// and a content-type so the client knows what's coming, then a blank line:
client.println("HTTP/1.1 200 OK");
client.println("Content-type:text/html");
client.println();
// the content of the HTTP response follows the header:
client.print("Click <a href="\"/H\"">here</a> turn Power on
");
client.print("Click <a href="\"/L\"">here</a> turn Power off
");
// The HTTP response ends with another blank line:
client.println();
// break out of the while loop:
break;
} else { // if you got a newline, then clear currentLine:
currentLine = "";
}
} else if (c != '\r') { // if you got anything else but a carriage return character,
currentLine += c; // add it to the end of the currentLine
}
// Check to see if the client request was "GET /H" or "GET /L":
if (currentLine.endsWith("GET /H")) {
digitalWrite(RelayPin, Turnon); // GET /H turns the LED on
}
if (currentLine.endsWith("GET /L")) {
digitalWrite(RelayPin, Turnoff); // GET /L turns the LED off
}
}
}
// close the connection:
client.stop();
Serial.println("client disonnected");
}
}
void printWifiStatus() {
// print the SSID of the network you're attached to:
Serial.print("SSID: ");
Serial.println(WiFi.SSID());
// print your WiFi shield's IP address:
IPAddress ip = WiFi.localIP();
Serial.print("IP Address: ");
Serial.println(ip);
// print the received signal strength:
long rssi = WiFi.RSSI();
Serial.print("signal strength (RSSI):");
Serial.print(rssi);
Serial.println(" dBm");
// print where to go in a browser:
Serial.print("To see this page in action, open a browser to http://");
Serial.println(ip);
}
網頁控制繼電器模組測試結果
首先,透過IDE開發程式的監控畫面,可以看到IP網址,如圖(1),所以我們啟動瀏覽器,在網址輸入該IP網址進入該畫面之後(本文IP為http://192.168.2.102/),可以看到已建立網頁伺服器,如圖(2)。
接著如圖(3),我們點選「Click here turn Power on」,就可以打開繼電器模組的開關;而如圖(4),點選「Click here turn Power off」,就可以關閉繼電器模組,測試程式結果畫面如下:

(1)透過網頁控制繼電器模組測試程式結果畫面-監控畫面
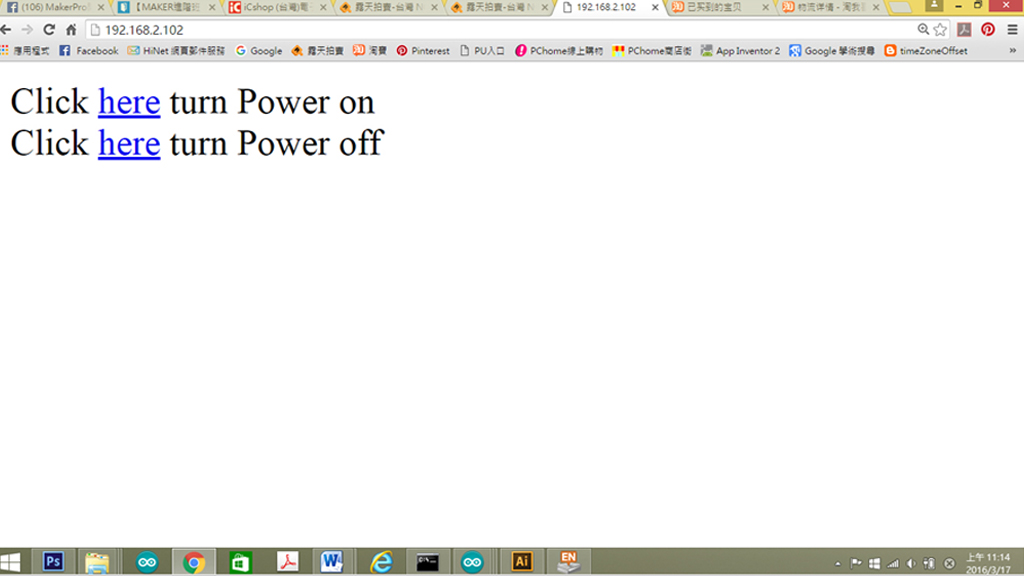
(2)透過網頁控制繼電器模組測試程式結果畫面-網頁畫面
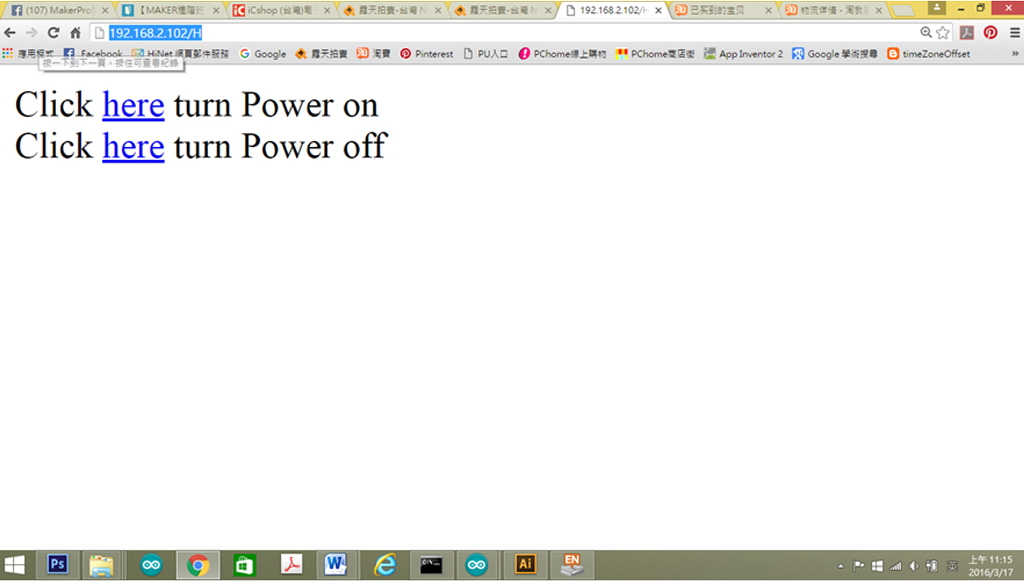
(3)透過網頁控制繼電器模組測試程式結果畫面-開啟繼電器
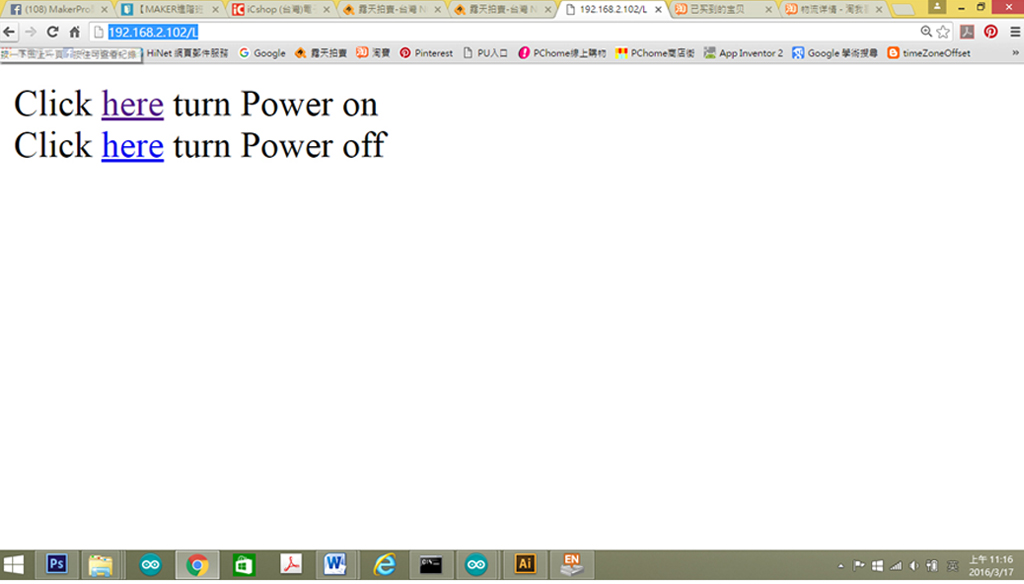
(4)透過網頁控制繼電器模組測試程式結果畫面-關閉繼電器
控制電力開關
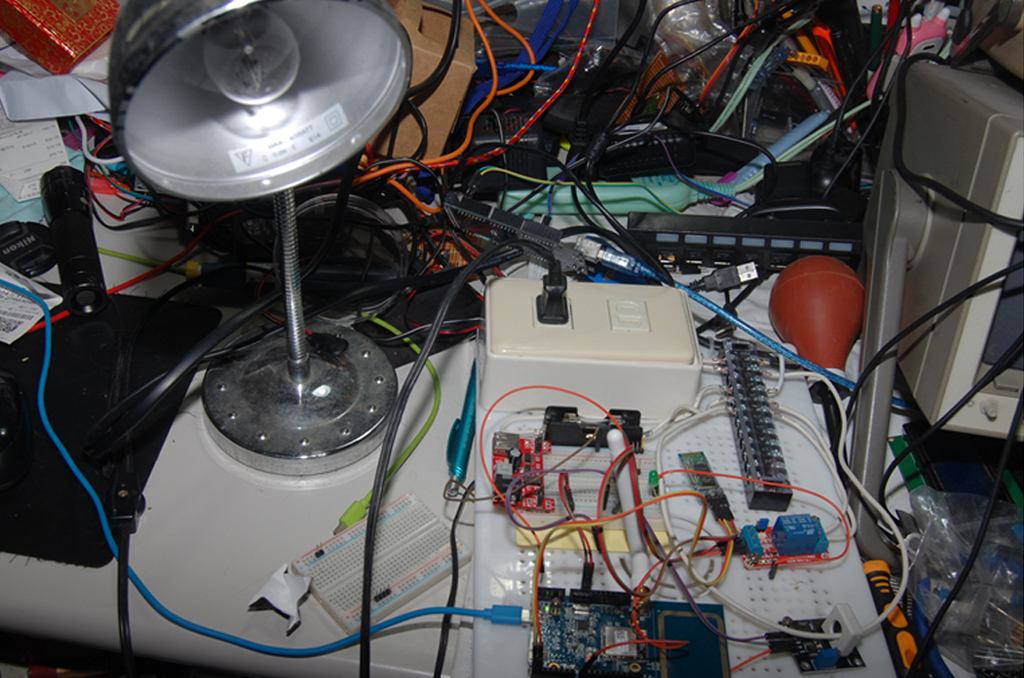
我們將繼電器模組接上外部的電力,如圖所示,使繼電器模組串上電力來源,並輸出到電力插座上,完成外部電力開關控制的電路組立。
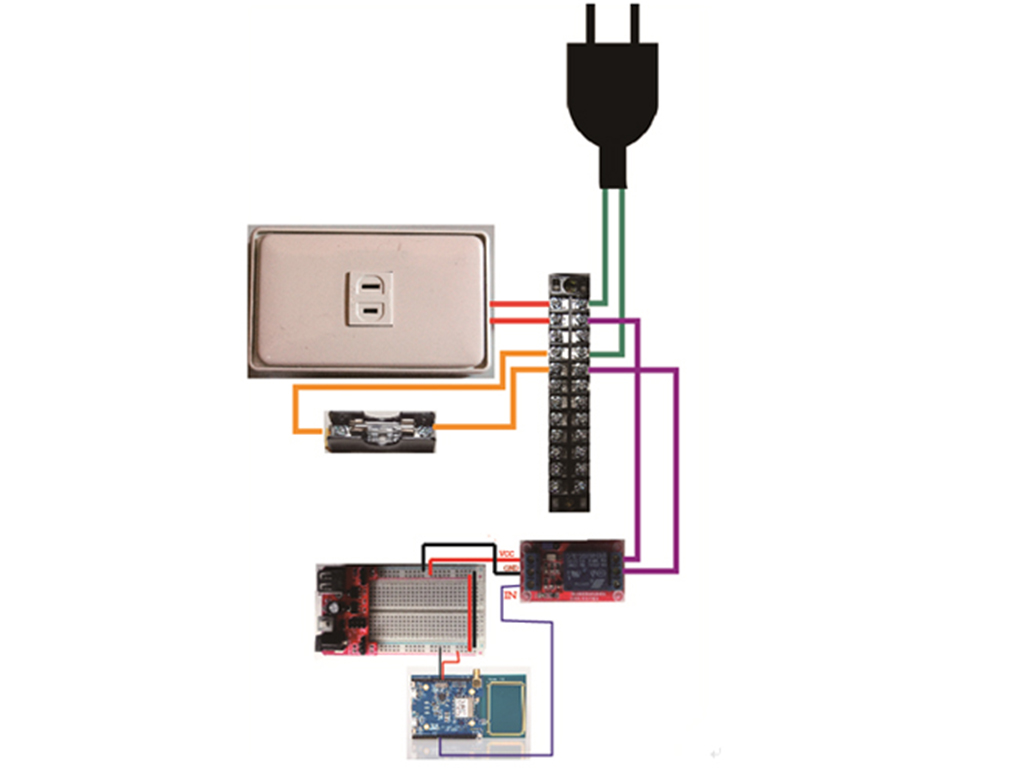
繼電器模組串連電力電路
接著,重新跑『透過網頁控制繼電器模組測試程式』,便可以控制電燈開啟,再點網頁來關閉,可以控制電燈關閉,如下圖所示:
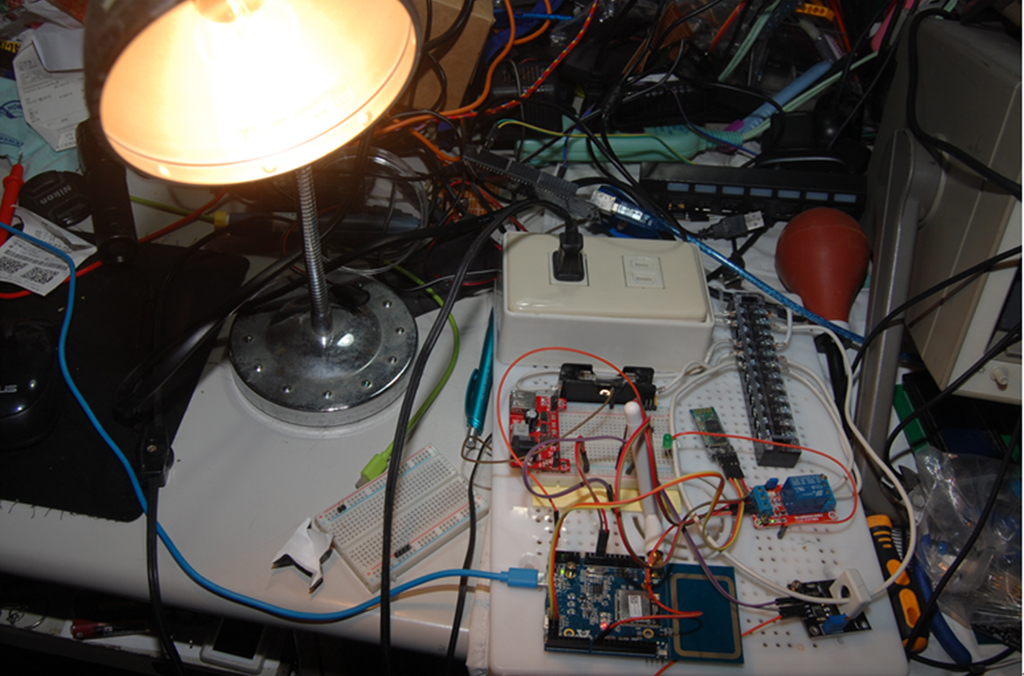
開啟電力
關閉電力
小結
本文主要讓Ameba透過Wifi模組連接上網路,成功建立網頁伺服器、連結繼電器模組與外部電力,達到控制電器開關的機制。透過解說,相信讀者更可以更了解Ameba開發板,創造物聯網的核心技術,控制電力資源的供應。
延伸閱讀
- 【大氣監控站台開發案例(下)】環境監控即時監控看板 - 2021/11/25
- 【大氣監控站台開發案例(中)】環境監控雲端平台系統介紹 - 2021/11/02
- 【大氣監控站台開發案例(上)】 大氣監控站建置實例介紹 - 2021/10/18
訂閱MakerPRO知識充電報
與40000位開發者一同掌握科技創新的技術資訊!


2016/12/05
請問,
這種網頁控制方式,在裝置隱身於router後端,有辦法可以從外部網路(譬如手機網路)使用?
謝謝您!
2016/12/15
可透過FB與作者聯繫:https://www.facebook.com/ultima.bruce?fref=ts
2016/10/18
client.print(“Click here turn Power off
“);
我們執行到這行就有問題 為甚麼?
2016/10/23
建議您聯絡作者:https://www.facebook.com/ultima.bruce?fref=ts